The sled started out as a 1998 MXZ 583. It has evolved through the years, to what it is today.
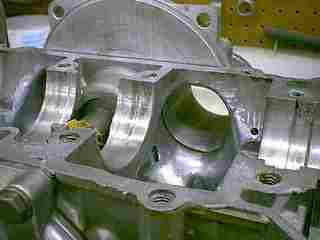
These are some shots of the upper case, intake and the port work that I did to them. They were opened up to accept 45.5mm carbs. That is the maximum size you can bore a 44mm Mikuni before having to double bore them, and add a wider slide.
The intake tapers down to 42mm to keep the velocity up. Which is 4mm larger than the Ski-Doo race book says.
My goal for the sled was to be wicked in the trails, but still keep the renowned torque of the rotary valve motors.
But give it a higher RPM range for those blasts across the lakes. I should preface this article by saying that the goal was to get more HP from this motor, WITHOUT sacrificing a lot of reliability. There may be engine builders out that are getting more HP by epoxying the case and opening up the transition even further. I didn't want to go that far on this motor. I was trying to be conservative, yet somewhat aggressive (If that makes any sense).
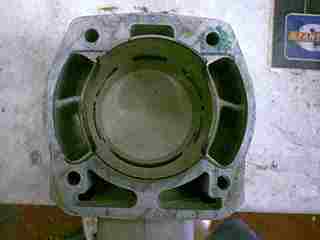
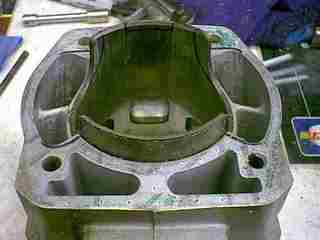
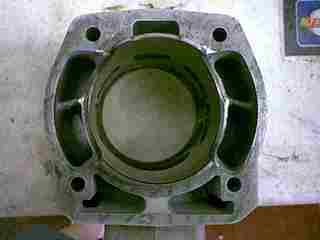
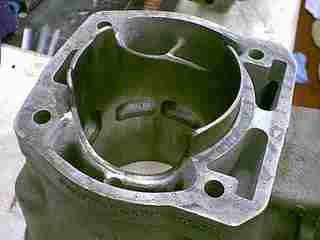
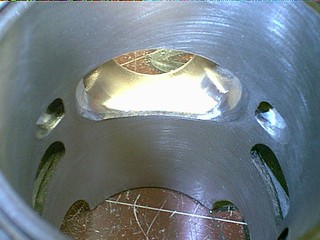
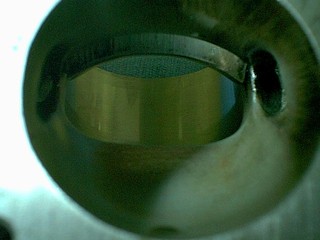
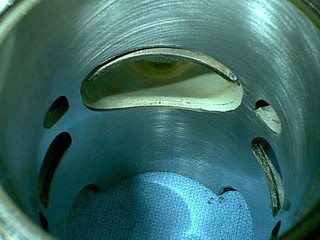
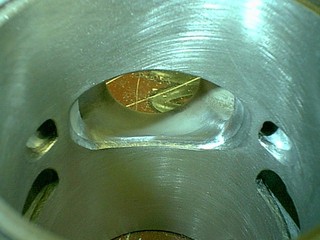
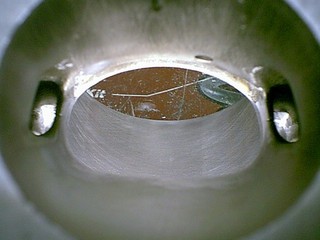
These shots are of a stock cylinder prior to any work being done.
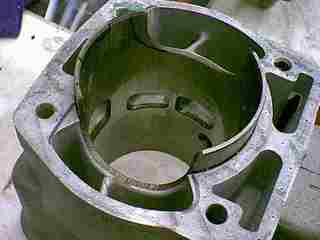
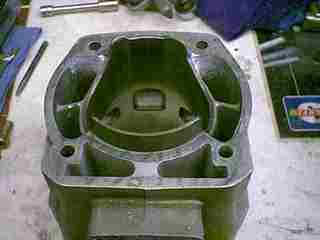
These are the cylinders after the transitions have been smoothed and surface matched.
I didn't want any turbulence to interrupt the air flow to the top of the transfer ports. There were many test fittings, marking, grinding, test fittings, marking grinding, etc. Anyway, you get the picture.
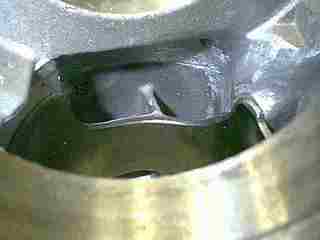
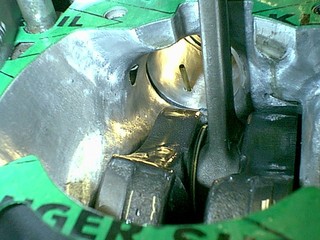
Here is what the transition ended up like after the port work.
It is quite rounded and smooth.
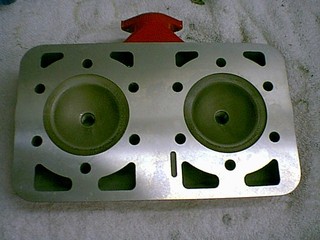
Now that the case and cylinders were matched. It was time to work on the exhaust port.
I opened up the curve on the top of the port, and lengthened and opened up the boost ports. I only raised the exhaust port timing about .005" to smooth it out. I used a thicker base gasket to raise the exhaust port timing.
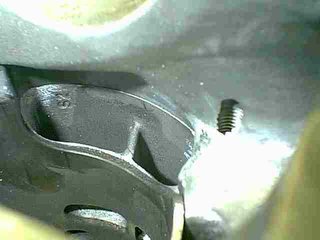
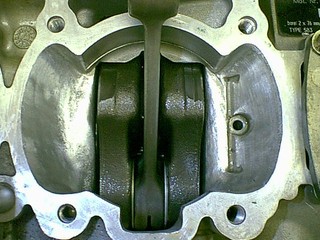
Here are the shots of the ports prior to any work being done.
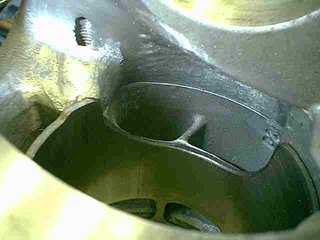
These are the shots of the after. The first shot shows the port work done on the right side in comparison to the left (which is stock).
It doesn't do any good to go to all this work to smooth transitions if the base gasket is hanging out inside the ports.
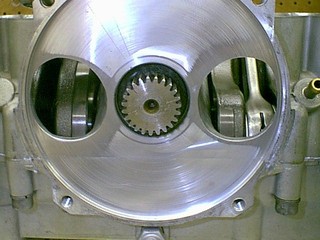
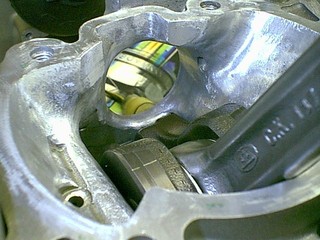
This is the clearance with the case, intake and crank set into place. A little further "tweaking" was done at this point with some transitions into the case.
Then the whole thing came back apart. The interior of the case, intake and cylinders were then sand blasted for the perfect finish.
It was now time to dry fit everything together and check for squish height.
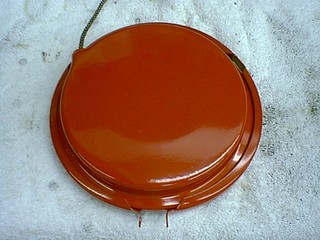
Earlier, while I was doing the port work, I sent the recoil cover to be powder coated to match the 583 color of the head.
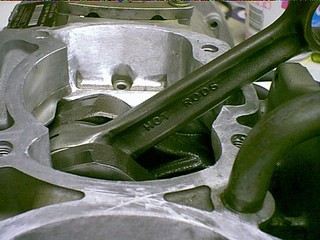
I installed the pistons and rings, all the parts on the motor, checked for RAVE clearance to the piston rings (which I set at .015" after we bored the pistons to the final size).
I then checked the squish height with .090" solid core solder wire. The original reading was .085" with the extra height in the base gasket.
I then had the head milled to bring it back down. I ran the clearance a little tight on the squish at .035". It was detonating pretty hard, so we aborted the dyno runs with 125.3HP, and opted to redo a head to get .055" - .060". I got the different head back and the squish was now a perfect .058" across the board.
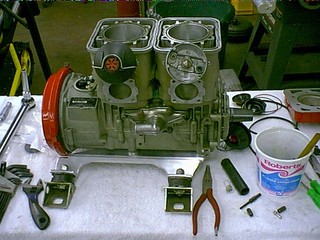
Now that all the engine work was done, the parts were sent to Swain Tech. The exhaust port, under side of the head and piston tops were coated with Thermal Barrier Coating. The piston skirts were coated with Polly Molly.
Once the parts came back, the cylinders were honed to final size. The motor was then put together using liberal amounts of 2-stroke oil.
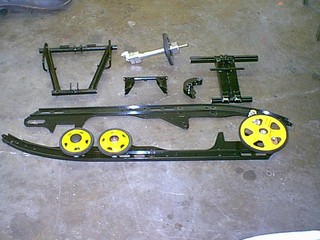
It was now time to set my sights on the rear suspension. I obtained a SC10-III from Big John, right here at DOOTalk. It had HPG rebuildable shocks.
I tore the whole thing down. I then sent the pieces to Rainbow Paint to be powder coated black.
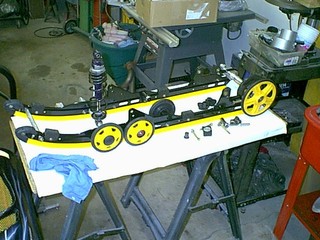
This shows the pieces back. I used yellow accent pieces (like Madness). These included yellow idler wheels from a REV chassis (they are slightly larger in diameter) and the rear 8" wheels from Arctic Cat.
I also used an Off-Set axle from Competition Engineering on the rear wheels.
Once the pieces were all back and the bolt holes cleaned, the hyfax put on, the shocks back and the new springs ready to install, I had some 'tweaking' to do.
I use nylon bushings under the rear torsion springs. They are thick and keep the spring from moving around on the cross bar in the rear upper half of the scissor. I had a set from a '98 SC10 suspension. The problem was that the rear upper cross member was larger diameter on SC10-III. It was Recreational Motorsports back to the rescue. I had Scott machine the inside diameter to fit the new cross member.
I use a bushing to keep the rear torsion springs from sliding all over the place. The are small enough to allow full movement of the spring to compress. They are large enough that the spring does not slide back forth. It makes the spring work in the manner in which it was designed with no slop.
Here are some pictures of the rear suspension under re-construction.
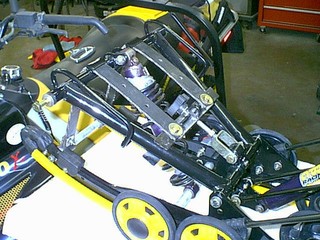
The shocks were re-valved for my weight and riding style. I wanted them a little firmer as I am planning doing some air-time with this sled. The shocks were a HUGE improvement even over the Ryde-FX that I put in it several years earlier.
This is a shot of the adjustable limiter strap I put on the sled. It can be adjusted with a couple of turns in or out to reduce or increase ski pressure.
These can be found on many mountain sleds. I have found they are just as useful on trail sleds also.
I am currently working on reshafting an Arctic Cat Cross Country set-up that is hydraulically controlled from a turn screw on the handle bars. You would be able to adjust this without getting off the sled.
I want to put a course thread in it to make adjustments quicker, and need to put a longer rod on the shocks. The travel is not a problem as there is plenty of room for that. The rods are just shorter on the Cats than the Ski-Doos.
I run the front shock on the softest setting possible.
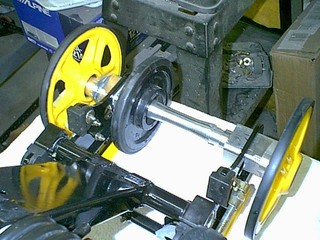
This is a shot of the Competition Engineering off-set rear axle.
It is set for a Ski-Doo. The problem is that the Arctic Cat wheels use a .787", and Ski-Doo uses a 25mm bearing.
I had a buddy machine the outer stud down to fit the Arctic Cat bearing. The inner wheel used a standard Ski-Doo rear wheel.
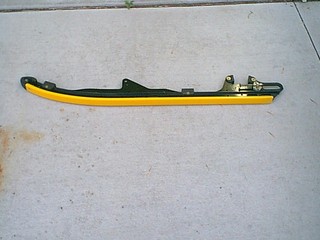
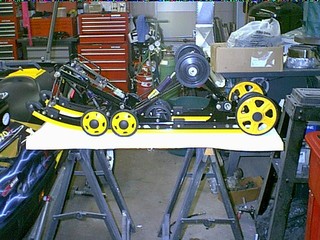
Here is a shot of the completed skid frame ready to be put into the sled.
I use a 1.25" X-Force track from Kimpex. I have 144 1.52" Woody's studs in it with Power Tower nuts and red anodized backing plates.
I absolutely LOVE this set up. I will let you know that if you try this set up, you will need to run both inside wheels, or the track will ratchet.
I didn't take any pictures of this next part as it is the same thing that was done on the Madness project.
I dropped and rolled the chain case 5/8" down and 3/8" back. I purchased these templates from SLP. They are extremely nice units and are made from stainless.
To keep the suspension geometry correct, I placed 100lbs in the engine compartment, and then put the rear suspension under the sled and positioned it 3/8" back from the original holes.
The SC10-III will bolt into the S-Chassis, but my goal was to have full suspension travel. I relocated the holes, made new steel templates on the track side, and new aluminum pieces on the footwell side.
Here is a shot of the drop and roll after completion. You can see how nice the stainless plate looks in the belly pan.
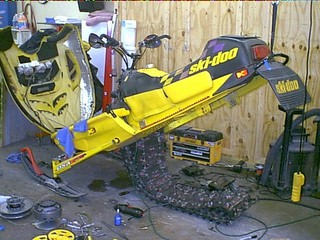
Now that the motor is done and the rear suspension is in place, it was time to move to the engine bay area.
I got rid of the MXZ two piece style motor mounts. Those mounts lay the motor at an extremely forward position.
I obtained a motor mount from a Summit. This set the motor more upright. This is more conducive to weight transfer for better acceleration. The loss in trail performance was negligible. I really couldn't tell any difference, except that it hooked harder. Which I think was a combination of the new rear suspension and weight distribution.
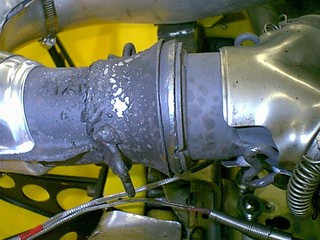
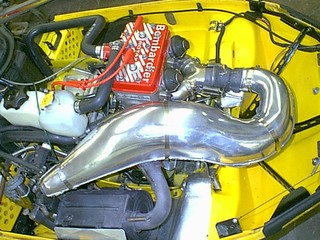
I purchased a Y-Pipe from a '02 MXZ 800. I modified the openings just a tad to get them port match the exhaust. Other than that, they are direct bolt on.
One reason I chose that model was that they come with a grafoil seal. Not the donut that needs Copper-seal to seal them up. This is a much cleaner set up. I can pull the springs off and pull the rest of the exhaust off in one piece.
It also fit the angle of the motor perfectly. To finish it off, I welded bungs in the bottom for my Digitron EGT probes and then smoothed out the inside port.
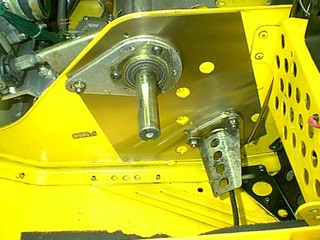
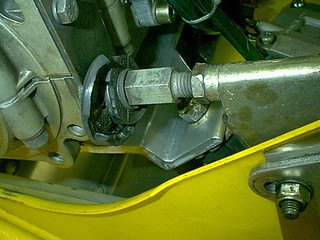
I did have to drill out the center motor mount hardware in the frame and move to the right and rivet it back in place.
I have a picture of the torque strap from SLP to help keep the clutches aligned. The break in period trashed the rubber bump stop from the factory.
Here is what I was talking about on the rubber stopper. I didn't have enough belt deflection set on the break in period (thinking that would keep from opening her up all the way...silly me.)
After l let her run up to 8,000K a couple of times on the lake, it pretty much mashed the stopper to nothing.
In addition, here are some shots of the competed Y-Pipe with heat shields and EGT probes mounted.
There is also a shot of the completed exhaust after the heat shield was polished and the rivets replaced with stainless worm-clamps.
I did not want to go with an aftermarket set up as the Wisconsin DNR are cracking down hard on loud pipes. At $168 per fine, it's just not worth a couple of HP.
I can attest that they are stopping and checking. On Friday night of Derby week I got stopped. They checked for the can. No worries here.
The motor is now in place and the Y-Pipe corrected.
I used to have a DynoPort can on the sled. With Wisconsin getting more strict on noise levels. I opted to go back to a stock set up.
The wife and I went to Hay Days this summer and met up with Troy, Howler, Fish, J Lowe from Team Summit, Hiawatha and some others. (We also partied with Team Thunderstruck and 13 Step - that is whole other article!)
I found a GREAT deal on a factory pipe and can. The can looked brand new. It still had the fiberglass strands in it. Some kid was watching the booth for his dad. I offered him $25 for the pipe and can - he took it. We got out of there before the dad came back.
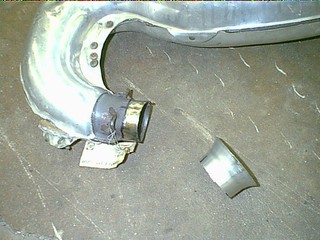
I then took it a shop I work part time at. I cut off the socket end, and flared a new end to fit the Grafoil seal. I also shortened the pipe about a 1/2" at this time.
With all the exhaust work now complete, it was time to put the finishing details on the system.
I removed the heat shield, that is riveted on. I then cut off the rivet flanges and smoothed all the metal.
I then polished all the aluminum pieces and put it back together with stainless steel worm clamps.
I then sand blasted the exhaust tube and muffler and painted them with flat black John Deere muffler paint.
Now that the exhaust is done, the engine is in place, the chaincase dropped and rolled and the rear suspension in place it is time to set the clutches in place.
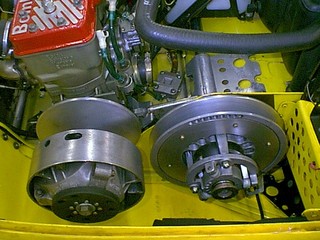
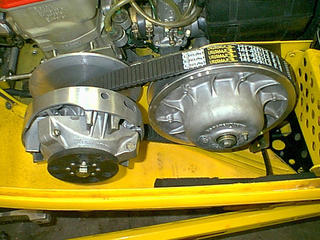
I originally used a 'mostly stock' TRA drive clutch and an Artic Cat reverse cam roller secondary driven clutch. I purchased a conversion jack-shaft from Fett Brothers to bring the whole thing together.
Here you can see the Artic Cat secondary in place. The second picture is of the alignment procedure. You need to have a 1.25" belt deflection on this particular set-up.
I might mention that I did machine the dust shield out of Arctic Cat clutch to allow the belt to run further down in the sheaves. You also have to shim the Cat clutch away from the jack-shaft bearing surface or it will not allow it to open all and rub on the bearing collar.
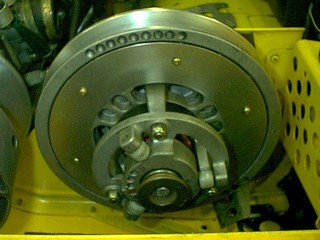
Since the writing of this original article, I have changed the clutch set up.
I am now running a lightweight TRA with Thundershift arms and 300 ramps. I am also changed to a TEAM TSS-98 secondary.
There a big difference in backshiftting from the Ski-Doo secondary to the Arctic Cat. There is a HUGE difference in backshifting (for the better) in using the Team.
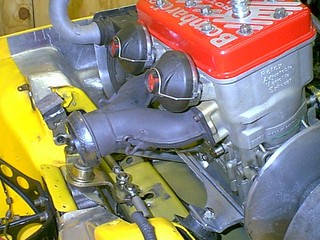
I had the carbs bored to 45.5mm. As stated previously, that is the max size without changing slide size.
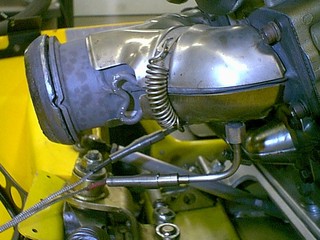
I still use the stock air box for noise reasons, as previously stated.
I did remove the stock air boots from the air box. I replaced them with air boots from a ZX model. The ZX boots are longer and make an air horn inside the box to get a longer straighter shot of air into the carbs.
You can see in these shots how much difference there is in the boots.