I never really did like factory color schemes on a sled. Almost every sled I have ever owned has been modified in some manner. The older I get, the more they get modified. I have changed everything about the current sled.
The engine has been slightly modified with a Big John Trail Torquer kit. I think the next will be his SHR840 kit.
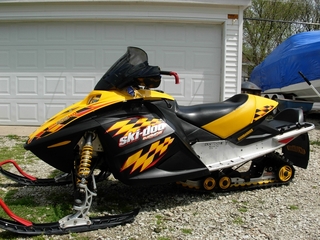
This is the sled as it was when I first brought it home in October of 2007. I bought it from a guy in Chicago for $3000. It is a 2004 MXZ 800HO Adrenaline.
From here, it got completely torn down and rebuilt and was turned into an X package sled. I purchased all the stuff to convert the sled off of Ebay, SnoWest and on Dootalk.
After selling a bunch of stuff, and keeping a sharp eye out for deals, I have a total investment of $4300 in her. I could have purchased an X sled, but what fun is that!
The first thing was to remove all the decals from the body panels. I traded even up with a guy for my yellow hood and console and the yellow seat and trunk lid from a guy in Wyoming. He wanted my yellow, and I wanted all black. That worked out VERY well.
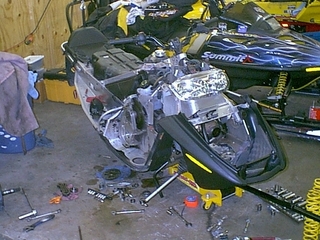
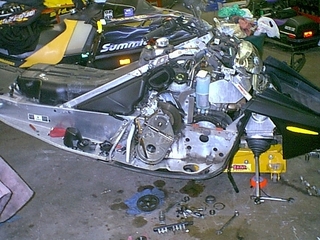
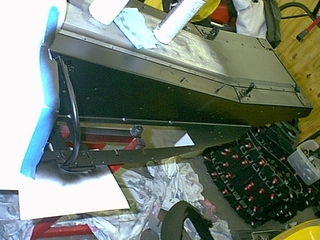
Here is the sled after being torn down. I tore it down in two segments. I first tore down the back half of the sled.
Here is the sled with the back half torn down.
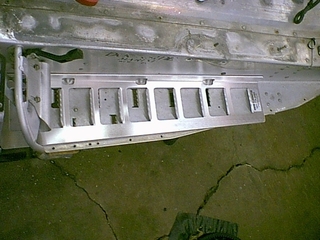
I got Snow Eliminators for the footwells. I had to modify them to fit the X-Chassis. That is part of the reason I got this particular sled. It did have the X-chassis footwells.
Here is the left footwell with the edge guard removed.
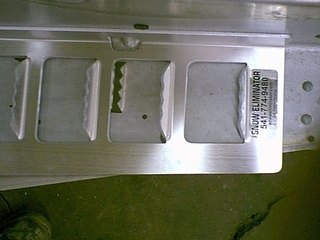
They will have to be cut to fit the Snow eliminators. Once it is laid-out, the running board will be cut to fit the Snow Eliminator, and the Snow Eliminator will be cut to fit the chassis.
You can see how they do not fit this running board very well.
Once the running boards were complete, I cut the holes to remove the material needed. I then cut down the Snow Eliminators and sent them to be powder coated with a black wrinkle finish. I also sent out the footwell adjusters to be powder coated to match.
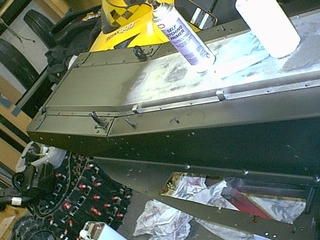
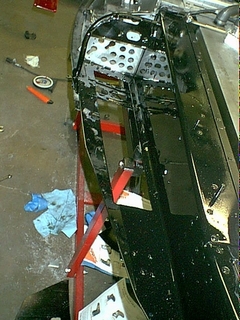
I sanded, primer etched the tunnel and painted it with Imron gloss black. Here are the shots of the primered tunnel.
Once it was all in primer. It was sanded again and then painted with Imron automotive paint. It is VERY tough paint, and takes the abuse.
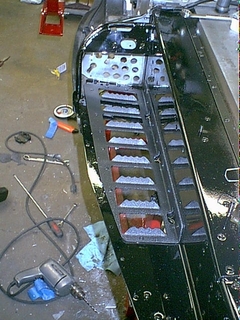
Here is the running board cut and painted. The next step is to install the Snow Eliminator and the footwell adjuster.
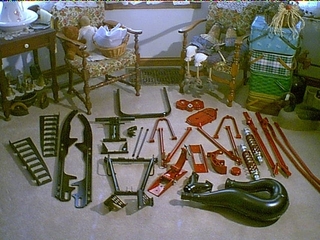
Next is to install the outer edge. I had those powder coated Candy Apple Red from Cool Concepts. I am going a little out of order here. I took all the trim off the sled that I wanted to have powder coated. I dropped it all off at once. I will show a picture of all the powder coating that I had done. If you send it all at once, you get a better per piece price.
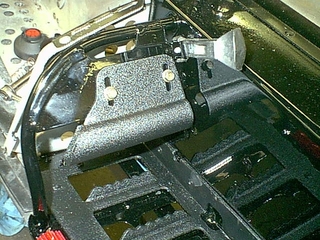
Next is to install the footwell adjuster
Before I go much further, here is the initial set of items that I had powder coated. The total cost of all the stuff was about $450.
On to the front end -
I bought a set of clicker front shocks from my local Ski-Doo dealer. He has had them for a couple of years. He ordered them for a guy, he then wrecked the sled before they came in. He ended up selling them to me for cheap, VERY cheap.
I ended up finding a set of XRS shocks at a local swap meet that had slightly bent shafts. I ended up buying the XRS shocks for less money than I sold the clickers. I straightened out the shafts on the XRS shocks and they work perfectly.
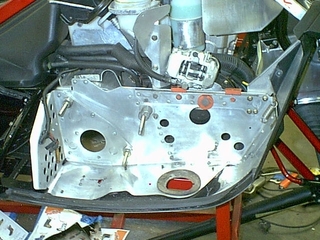
The next move was to strengthen up the consumer chassis of the REV. Matt Santwire (right here from Dootalk) hooked me up proper with that. I bought his front end stiffner kit for $175 shipped to my house.
You have to buy the race brace for the chain case side from Ski-Doo. It is part # 518324096 for that brace. While I had the chain case out, I cleaned up this area prior to installing the brace.
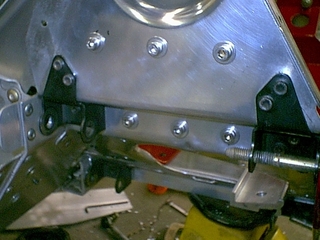
Here you can see the old brace. This is the new brace installed. It is an extruded piece instead of just a plain extra piece of aluminum. I bolted it in place with button head bolts with nylocs on the backside.
This is the side by side shot of them.
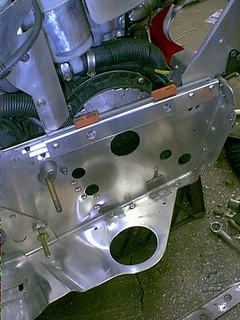
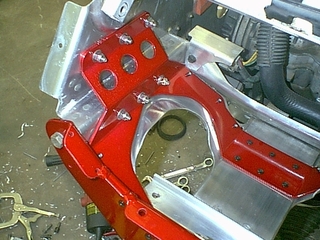
I next tore the front end apart to complete the remaining bracing. Matts kit has a carriage brace, a new front NUN plate and a side plate for the PTO side.
Here is the brace installed on the PTO side.
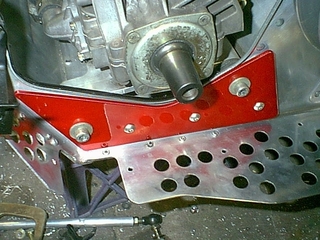
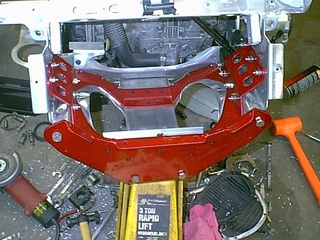
Here are some shots of the complete bracing in place. The front, center brace in place. I again used button head bolts with nylocs to hold them in place. I then riveted the main body in place. Everything powder coated in Candy Apple Red is additional bracing.
You can see how much different there is in the thickness of Matts plate, and the factory plate.
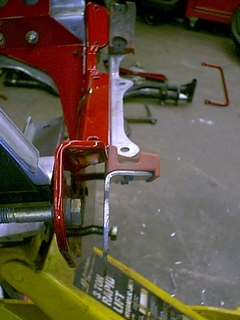
To reinforce the bottom carriage brace should be welded. I did not have the proper gas to weld this piece properly. Instead of buying a new tank to hook to my welder, I opted to rivet this piece in place. Here is that piece installed.
With all the bracing in place, it was now time to get rid of the SC10-III and install the new SC10-IV I purchased from a guy in Minneapolis for $275. It came with the rear piggy back clicker shock. (what a deal!!!) I found the correct front shock on Ebay that had a torn hose. I had a hose from old shock with a broken shaft. Total investment for that shock was $210.
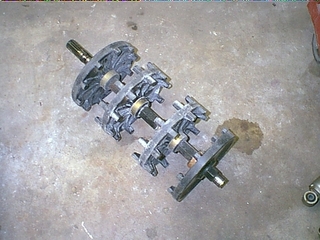
First step to getting the rear skid in place was to replace the drive axle. Since the Adrenaline sleds came with 10 tooth standard drivers. The X sleds have 10 tooth extrovert drivers. I had to make sure that the front of the skid did not hit the drivers. They needed to be in place in order to check that. I purchased brand new drivers from my Ski-Doo dealer for about $100 for the pair.
Here is a shot of the old driver.
Here is shot of the new drivers pressed on the shaft and centered in the chassis with the track in place.
With the drivers in place, it is now time to get to the install of the SC10-IV. Luckily, my Ski-Doo dealer had an 07 XRS on his lot. I went to the lot with a tape measure in hand. I took the measurements of the locations of the brackets and the location of the front arm mounts.
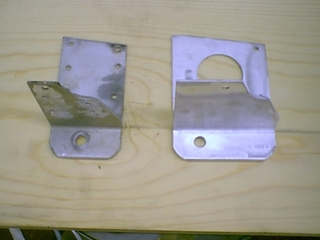
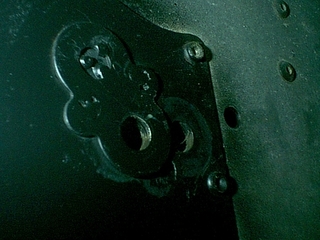
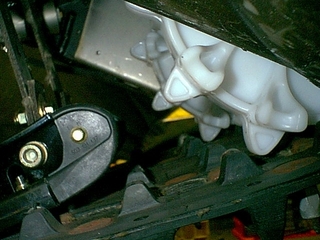
I also ordered the correct new brackets for the SC10-IV. They are different than the SC10-III. Here you can see the difference in the two. The left one is the old bracket, the right side is the new bracket.
When you put the brackets on the chassis, the back to pre-drilled holes line up perfectly.
The part numbers for these are 518324488 and 518324489. I got them both for about $30 from my Ski-Doo dealer.
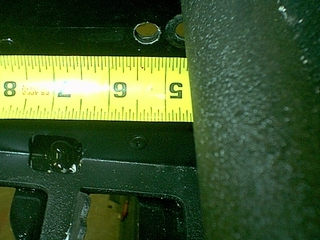
The front arm mount needs to be about 5 from the front fire wall. I then moved the rear steel reinforcement on the backside to the proper location.
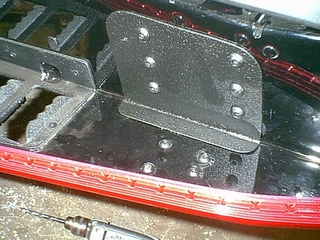
Next was to get the rear drop brackets installed. With the front holes in place, I took the measurements from the XRS sled. The rear drop bracket rivet holes lined up perfectly with the old rivet holes. This told me I had everything in place properly. I just drilled the remaining holes. I then made a plate to over and cover the old unused holes. This was just a cosmetic thing. I then powder coated the plate with wrinkle finish.
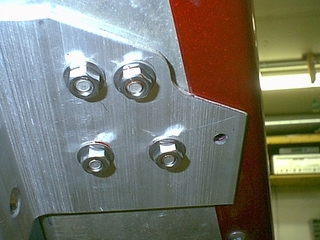
Here is the shot of the finished install. I again used button head bolts (powder coated black wrinkle finish) to hold it all in place. I used loctite on all the nuts.
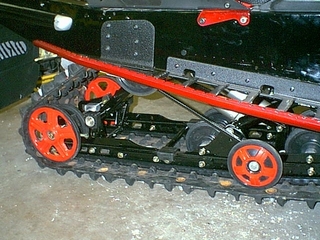
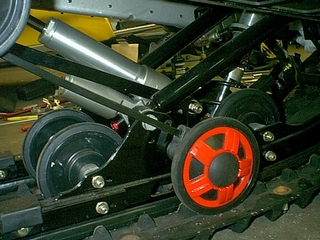
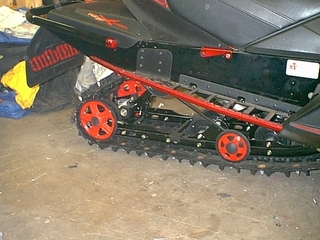
Here are some shots of the completed install. I had the entire rear skid powder coated in gloss black. I also used the off-set rear axle. The only two things I kept from Sickness was the Kimpex X-Force 1.25 snow cross track with 144 picks, and the off-set rear axle that is modified to accept 8 Arctic Cat wheels.
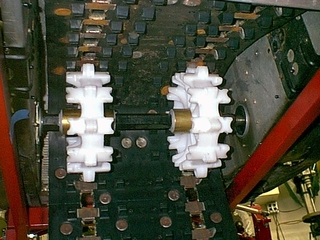
With the rear suspension in place, you can see that there is plenty of room to clear the front drivers.
And the rear axle bolts in perfectly.
Here are some shots of the shocks. I am running a 150lb center spring. I am running White/Green square rear torsion springs with BC3 (fromDootalk) torsion spring spacers on it. They make a HUGE difference in ride quality.
Here is the complete rear skid.
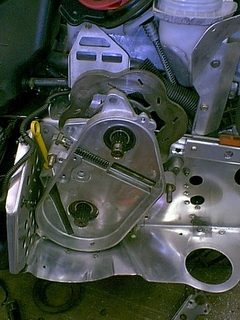
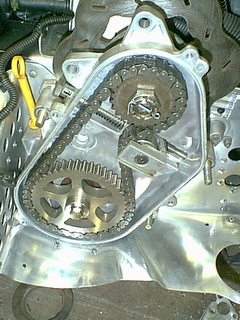
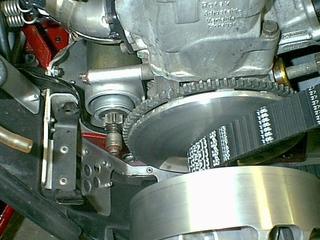
Permanently mounting of the chain case.
The next step was to reinstall the chain case. The area behind the case was completely soaked with oil from the chain case. At first, I just thought the upper jackshaft seal was leaking. Upon further examination, I found that the ribbing on the backside of the chain case was cracked. I ended up getting a brand new 440X chain case from Als Snowmobile (from Dootalk) for $75 shipped to the house.
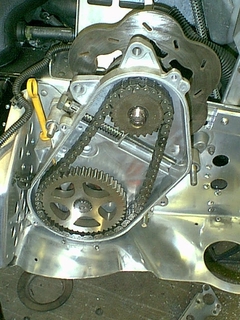
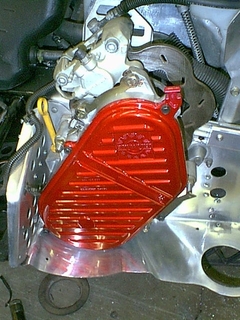
The chain case went in perfectly. With the powder coated cover, it looks pretty good, I think. I changed the gearing to 25/45 gearing and put the whole thing back together. After the chain case goes in, the new electric start will go in place.
While installing the new chain case, I found a wave rotor on Ebay for $35. So I picked that up, cleaned it up and installed on the new jackshaft. I put all new seals and bearing in the chain case while it was out.
I always use blue loctite on all bolts before they go back in for final assembly.
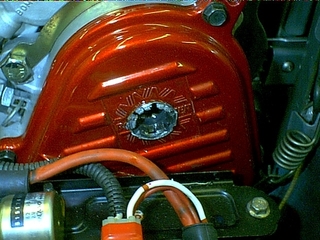
The finished chain case with the brake caliper installed.
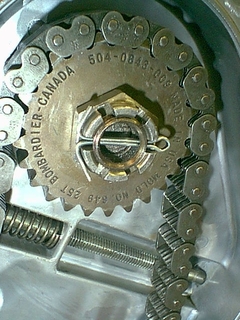
On a side note: One the second trip out, to Eagle River, WI, the cotter pin broke off. It was wadded up in the bottom of the chain case in about 20 pieces. We came to a stop and I could smell gear oil. I pulled the side cover, and this is what I found.
The castlated nut had machined a perfect hole in the side of my chaincase. No other damage was incurred. I bough a new cover from a guy in the swap meet section here on Dootalk for $10, had it repowder coated and it was ready to go. I took all the bearings out and cleaned them and cleaned the gears and chain before re-assembly. No more cheap Harbor Freight cotter pins. LOL.
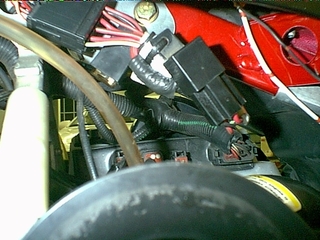
Installing E-Start on the sled
I purchased a set of new take off shocks from a guy for $150. They were XP rebuildables. I got them off ebay. The guy had it set at a 3 day auction, and they went for $150. Score!
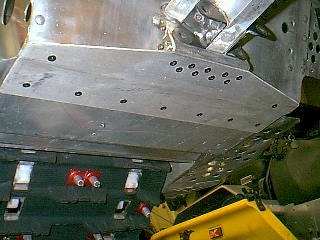
A guy here on Dootalk wanted to get rid of his E-Start but wanted some custom valved front ski shocks for his XP. We ended up trading even up, complete with battery. DEAL for both of us.
The first thing I changed out was the wiring jumper harness for whole setup. This is located under the console on the left hand side. Next was to pull the drive pulley and install the starter ring. You can then install the starter motor while that is out. The battery mounts outside of the chain case, and you simply route the wiring out of the way.