This is what I envisioned to be the perfect mountain sled. Now you know why I call this sled Mountain Madness - Bred From the Dead.
Everyone said I was mad to try and build a sled from this carnage.
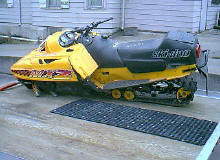
It started life as a 1997 MXZ 670. I bought if from Waterloo Auto Parts, totaled (with the engine in a box). Somebody tried to rebuild the motor and apparently did not have the know-how to put it back together. The salvage yard said that it was pushed off the back of a truck doing 50 mph, and then they got it after that. What a treasure at $300.
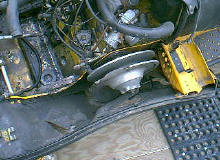
It did have some redeeming qualities. The engine, while in a box in pieces, was all there. It did also have reverse. The head was good yet and somebody put 44mm carbs on it at some point and it had Crank Shop twin pipes. The rear suspension was good with the exception of the slide rails and a couple of wheels.
There were a ton of good parts to sell. Sometimes the sum of the pieces are worth more than the total of the whole. That was this case.
The parts that were good off this sled, I sold on various websites and at swap meets. Granted, I had some parts in my "parts closet" in the garage to help along with the build. Even Monster Garage gets "Freebies".
My goal was to build a custom mountain sled for under a budget of $4500, and still have a decent machine to show for it. I wanted to build it for under $4000....but NOTHING ever comes in under budget...so $4500 was the true goal.
This is a list of stuff I sold before I even got started:
Crank Shop pipes $350.00 Snowest
RAVE assemblies $175.00 Snowest
44mm carbs $225.00 Snowest
Rear Shock & Springs $ 75.00 Dootalk
Seat $ 40.00 Locally
R Trailing Arm $ 50.00 Dootalk
R Arm Support $ 20.00 Dootalk
Gas Tank $ 40.00 Snowest
Track $ 75.00 EBay
--------------
$1050 - $300 for the sled left $750 profit.
Not bad. It's a start.
Around this same time, I landed a 670X motor from EBay that was in pieces:
I got a 670X basket case motor and a complete DPM with airbox for $109.00. Shipped to my house off of EBay.
I sold the pieces of the system on Snowest. I found that the 670X ignition system and DPM would not support the overbore kit I planned to install, so out the door they went. The parts went as follows:
Crankcase $150.00 Crank $160.00 ($175 - $15 to have checked for true.) DPM $250.00
---------------
$560.00 - $109.00 = $451 profit
That leaves a total profit of $1201
Now it is time to start building the sled:
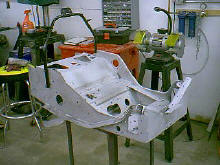
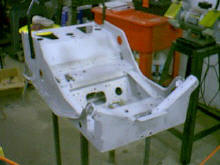
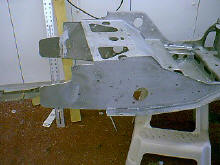
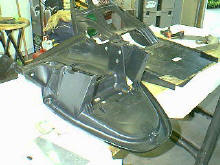
I detached the bulkhead from the tunnel and found that it was twisted slightly.
I purchased a used F-Chassis from Gary's Snowmobile for $50. It came with a tunnel, bulkhead, foot wells and trailing arm supports. It actually worked out better as the foot wells in the F-Chassis are about 1" wider than the MXZ's. SCORE!
Once I got it home and the pieces removed, I put it in my sandblaster and took it down to bare metal. I welded .100" 5051 aluminum tabs on the back of the bulkhead for the set-back in the suspension. I then ground them down to look stock with no visible weld marks.
I then had to cut out the bulkhead supports and make new ones that were stronger. You can see those welded in place. They are similar to the MXZ style supports. The front end should now be plenty stout.
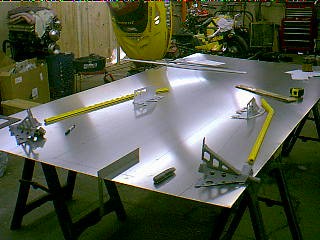
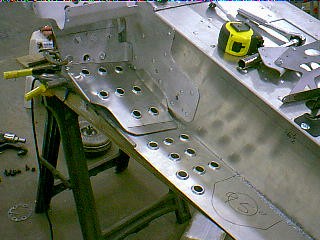
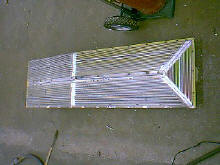
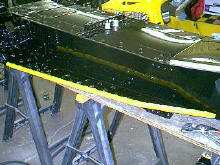
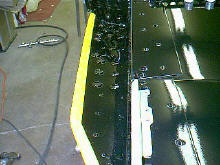
It was time to lay out the tunnel. I wanted to make the side pieces as one unit with the divide down the middle. This would give more strength to the entire structure.
I will admit, it was the first time making a tunnel from 5051 .080" aluminum. I did not get the first attempt correct. I was off by less than an 1/8" inch, but the bottom rivets would not have seated properly. So I did use 2 sheets of 4' X 8' aluminum. At $76 a sheet, it was still a LOT less than buying one already made.
Here you can see the layout. My next door neighbor builds custom lighting and neon business signs. I help him out from time to time, so I do have some experience bending aluminum. He has a press-break, so I can say that I did actually make it myself. I cut it out with a jig saw and a metal blade on the rounded corners, and cut the long straight lines on my neighbors 12" Niagra sheer.
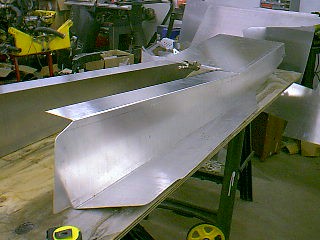
There is also a picture of the formed tunnel after I got it home.
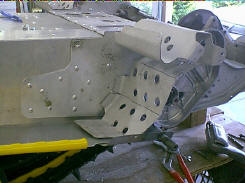
The next step was to set up the Drop & Roll stainless templates from SLP. The first picture shows the chain-case positioned, and in its final spot.
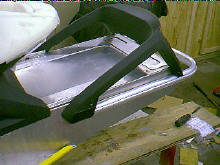
After that was done, it was time to move on to the foot-wells. The late 90's chassis had a steep angle to the foot-wells. This did not allow to you get as far forward as I would like. It was necessary to flatten them out. The first picture shows you what I mean. It is the stock foot-well.
The second picture was an attempt to use the running board as the bottom. This also did not allow your foot all the way in.
The last picture shows the final foot-well. It has a nice angle for your foot. You can still hook your boot in it, and you can get your foot all the way to the back of the trailing arm support.
Once the foot-wells were mocked up and ready to go in. It was time to make the flares on the hole for the anti-skid surface.
A friend of mine works at a plastic factory. He has access to a CNC machine. I had him make a custom flaring tool. It centers on a 5/8" hole. It is convex on one side, and concave on the other. One side has a hole that a bolt slides through, and the other is threaded.
You drill a hole in the board, put the concave part on the bottom, the convex part on top, run the bolt and hit with an air ratchet. VOILA..instant factory look.
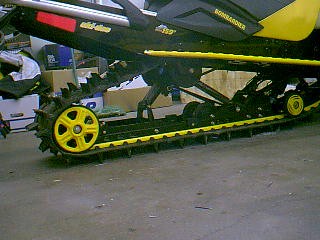
I originally bought a 2001 151" Highmark rear suspension from Snowest for $250. I took the rails off of it and traded them even up for a set of 136". With the 3.5" set back, I went with a 144" track. My original intention was to go with a 144", then move into the 151" with 144" rails an offset axle the following year.
Once the suspension was underneath it...it just didn't look right. So out it came. I sold the 144" track to a buddy of mine for what I paid for it. I sold the 136" rails to another buddy for about the same price as a set of 144" rails I bought off EBay.
I then bought a used 159" x 2" paddle track off Snowest for $175. I had the rails powder coated black, and put the yellow slides on it.
I had WildChild from Snowest make a custom rear extension/offset with an Arctic Cat axle and spacers. Arctic Cat is the ONLY Company that makes a yellow, plastic 8" wheel. Extension with off-set and Arctic Cat axle ran $180.
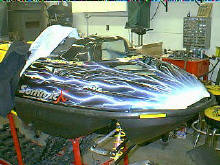
The picture is pretty close to being done.
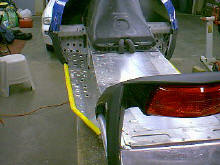
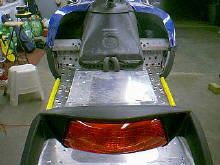
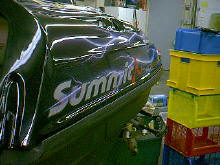
In these pictures, you see where I fit the '05 Summit rack, tail light assembly and bumper to the rear of the tunnel. I also fit the ZX steering hoop and clear tank, and set the '04 Summit seat in place to see how & what it was going to take to fit them together.
This is when I was playing around with the ski stance and ride height.
The side with the green shock spring is a stock 1997 Summit stance, which is 38". That was too narrow and way too low to the ground.
The shock with the yellow shock spring is the 38" stance with a MXZ shock. This raised the ride height to where I wanted (which was 1.5" taller than the S-Chassis), but at the same time it narrowed the stance. That wasn't going to work.
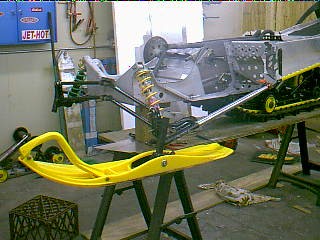
So a call to Fabcraft was in order. I got their adjustable radius rods, tie-rods red anodized aluminum heims and spacers for $271. I also picked up a pair of 17.25" Fox rebuildable shocks off EBay from a Polaris RMK for $150. Those gave me a 40.25" stance with the extra 1.5" of ground clearance.
The trailing arms I bought off of Snowest. They were just the spindle mounts. The arms had been broken, and he did not have them any longer. I picked them up for $25.
I got them and took some measurements. I found that the inside diameter was just a tad over 1.25". So I ordered a couple of Outlaw Sprint Car steering arms, and a couple of 3/4" heims. The steering arms are aluminum, light weight, strong and fit perfectly - and best of all CHEAP. They only run $24 each for the lightweight ones. The heavier ones are only $18 each. The heims cost me $24 for the pair. I cut them to 33", drilled them on the drill press for a set screw and they work perfectly.
I sent the shocks out to Goodwin Performance and they put thicker oil in them and revalved them for my weight and riding style. The bodies looked kind of crappy, so I had them put new shock bodies on. The total bill was $175. That is still only $325 for the front shocks, set up the way I want and the price of the shocks. The front end is good to go.
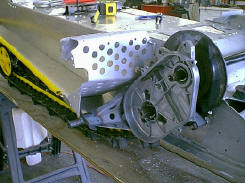
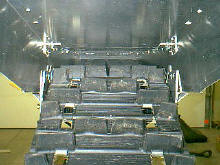
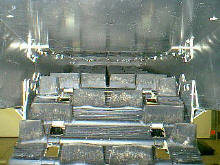
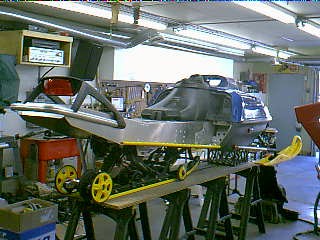
These pictures show the chain case dropped and rolled, the jack shaft mounted in place and the rear suspension fitted in place.
As you can see, the 144" looks tiny under the 159" tunnel. That didn't last long. That is what you get for thinking conservatively. Go big, or go home! Right
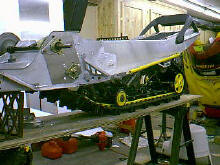
You can almost make out the extruded '05 Summit drop brackets. I got those are Gary's for $50 for the pair. The footrails are off a Summit as well. They ran $75.00 for the pair, and came in yellow.
What you don't see is the 9 tooth extrovert drivers, and the aluminum jackshaft I got from Snowest. $75.00 brought the 2 drivers and the jackshaft to my back door via UPS.
I later picked up a brand new Brake System lightweight brake disc from the Dennis Kirk scratch and dent stuff on EBay for $25.00. Apparently, they went out of business. Who cares It works. If it goes bad, I'll step up and buy a new SLP unit.
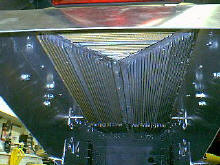
I included a picture of the under side of the tunnel as I now have over 3" of clearance in the back, and that tapers to 1.5" in the front.
I might mention at this point, that I put a bulkhead cooler from a ZX chassis in this as well. I still have plenty of clearance, and will have plenty of cooling as well. That will be for those 60 degree spring riding days.
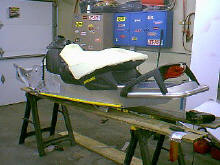
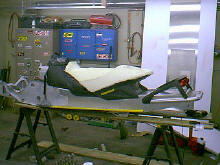
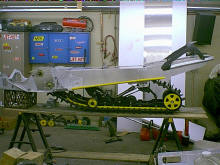
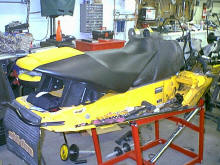
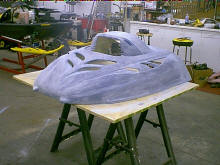
Time to move on to a little trickier part of the build. This could make or break the appearance. The seat. You can see how I envisioned it to look in the first picture.
So I purchases a new ZX seat frame from Gary's for $35.
I pulled the REV seat apart at the seams. I then had both frames exposed. I put the ZX frame in its proper position, then set the REV seat on top. I cut them until the bottoms melded together.
Then I made an aluminum piece for the seat to sit on. This needed to be sturdy enough to hold all a person's weight as the REV seat was designed to have a gas tank underneath it. You can see the picture of the corrugated aluminum piece I made for that. I then drilled holes in it to lighten it up a bit.
The nice thing about this is that I now have a storage tray under the seat. I just have to make a door piece on the back half of the seat bottom.
Once the two seat halves were riveted together and the support in place, the fronts need to be brought together and the rest of the supports made.
I needed to cut the front upturned portion of the REV seat off to fit under the ZX console. I then had to heat that up and let it bend to meet the ZX frame. I then sanded wood blocks to fit between them. Once I got the wood to the proper size, I coated them with fiberglass so they would not deteriorate.
Tom at Clemens Canvas here in town is friend of mine. He put some leather on the side panels to fill them out, and added the yellow front to the REV seat to finish out the seat. He did it when he had spare time, and I did some quick plumbing fixes for him. We both called it even. BONUS!
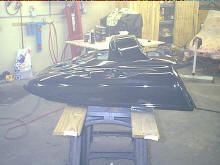
It was starting to get fun at this point, as you could see what it was actually going to look like. I had an idea in my head, but who knows what it would actually turn into.
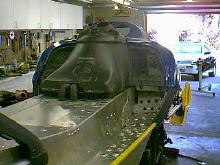
I got the belly pan, and hood set in place. Now I had to cut the side panels of the S-Chassis hood to fit the ZX chassis rear vents. I also had to cut out some on the part just in front of the handle bar riser.
You can see that it is turning into something at this point. My wife could even make out that it was a snowmobile now.
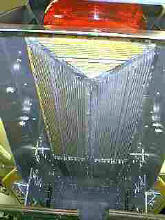
Now came the time to make the rear heat exchanger. I didn't want to lose any head room up front, so I made the exchanger from the cannibalized exchangers of the wrecked MXZ.
As you can see, I made a wooden platform to follow the contour of the kick-up. Once that was made, I cut the pieces of the old coolers to follow that contour. I made a large U-Cooler out of the whole thing.
Once it was all cut out, I ground down the fins enough to get a TIG tip in. I went back to my neighbors shop and TIG'd the whole thing together. Once it was done, it fit perfectly into the tunnel.
I dropped it back out, and filled a garbage can up with water. I then made rubber plugs to fit in both outlets. Then I put 20lbs of air pressure in it. I had one small leak. I hit it with the TIG again, tested it - and she was ready for install. Since the radiator cap pops off at 9lbs, I figured 20lbs was good to go.
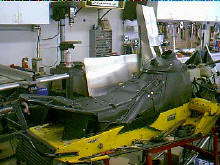
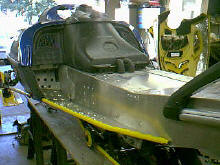
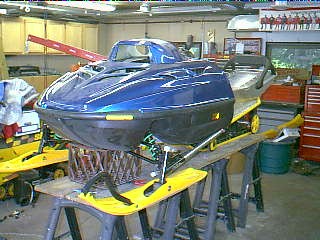
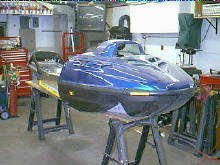
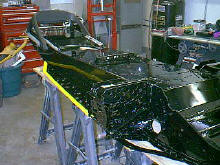
With all of the major components fit together, it was time to take a look at it all together before she came all back apart and went for powder coating.
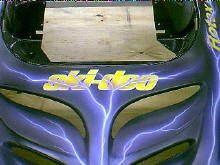
With all the chassis stuff at the powder coaters, it was time to start to work on the hood.
I sanded the entire hood down with 600 grit. Then I laid on a coat of flexible primer.
Once that all dried, I wet sanded that with 600 grit, and it was ready to shoot with House of Kolors black. I shot that and let it dry. Once that was dry, I wet sanded the whole thing again with 800 grit, and laid out the lightning bolts.
A buddy by the name of Perry Duchow (referred to as Howler) made up the custom decals. They look awesome on the black background with the lightning bolts.
When I laid out the decals, they kind of looked slapped on over the top of the lightning bolts. I went back over the lettering to tie in the decals and the art work. I had the bolts weave in and out of the lettering.
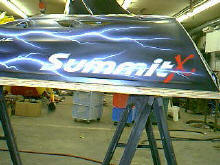
Once all the decals and artwork was complete. I laid on 5 coats of House of Kolors clear. Once it dried, I wet sanded it with 1000 grit, then went back over it with 1500 grit. Then I buffed it out with heavy compound on a coarse wool pad, then with fine compound on fine pad. I then went over it with a foam pad and swirl polish remover.
I must say that it came out quite nicely.
Now it was time to start on the motor for Madness.
I started with a '97 670 motor. It has since be resleeved and bored to a 740.
I pressed out the sleeves myself by heating them in the oven for an hour at 350 degrees. Then take them to the shop and tap them out with a brass drift and a hammer.
Once that was done, I opened up the transfer ports to match the base gasket, and smoothed out the walls to eliminate turbulence. I chose not to knife edge the leading edge as that tends to directionalize the air. I use the reasoning that if you look at the leading edge of an airplane, it is larger and round. This lets the pass over it and then tumble. The speed of the air in relation to the bottom and the top is what gives it lift. If you knife edge it, the air on side will tumble, while the air on the other actually directs away from it. If you round the edge, both sides act the in the same manner. I tested this theory with a heat gun and an incense stick. The stick gave me a smoke trail to follow.
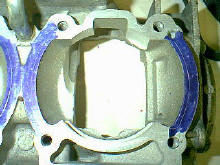
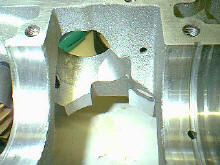
Then it was time to match the case to the base gasket. As you can see by the machinists dye (Dykem layout dye) quite a bit of material had to be removed. In some of the pictures you can also see that JB Weld was used on the sides of the Rotary Valve plate. The transition to smooth out the turn requires going through the case at this point a portion. JB Weld does the job of sealing it dependably.
These pictures show the layout and the before shots.