have been working with Kelsey from RK Tech for some time now.
The trail sled has over 7,000 miles on it. It is time for a change....and of course MORE POWER!!!
I have been running a Sled Head Racing Trail Torquer kit in it for the last two years. I am still keeping that kit in case I decide to sell the sled, I can put it back to stock.
I will be doing the complete build from start to finish with detailed pictures....as usual. LOL
I am hoping to have dyno results. Recreational Motorsports engine dyno is down, and he is not sure if he is going to rebuild it. I would like to try to find an engine dyno for testing.
I will be going from top to bottom on this build, just like Spawn. I will show detailed pictures of the build and modifications that will be done.
Stay tuned...this is going to be a LOT of fun!!!
------------------
I want to hit 115 actual speed as per my GPS. My Rhino will tell current speed, or I can lock in the highest recorded speed.
I have had the speedo to about 117, but the Rhino only showed 104mph actual MPH. I want to set 115MPH on the Rhino. We'll see. If it goes faster, that is just a bonus. I will hammer it to the bar until it quits accelerating. Once it holds top end, we'll see what it does and how the clutches look.
I will be working with Kelsey on the motor, and DJ on the clutching for it. Between the three of us, we'll what she will do.
------------------
This build will have all the good stuff in it. Kelsey's 827 kit, Dynamoe Joes clutch kit, bigwormskidoo05 oil pump fix, Holtzman ATAAC will also be added for consistant jetting across the range.
It is getting the 07 air box update, and possibly a tune can from The Thing. We will have to wait and see what Kelsey recommends for a lightweight can.
I may be changing from V-Force III reeds to Boysons, but we will have to see what Kelsey says on that, as well. I am going to do something different on this. I am leaving all the performance stuff up to Kelsey. I will do the tuning on it, but be using only recommended stuff.
This will give you a real world example of his stuff with just the tuning left to me.
I may even grass drag later this summer to see what she has in the tank.
Stay tuned everyone...this should be fun.
--------------
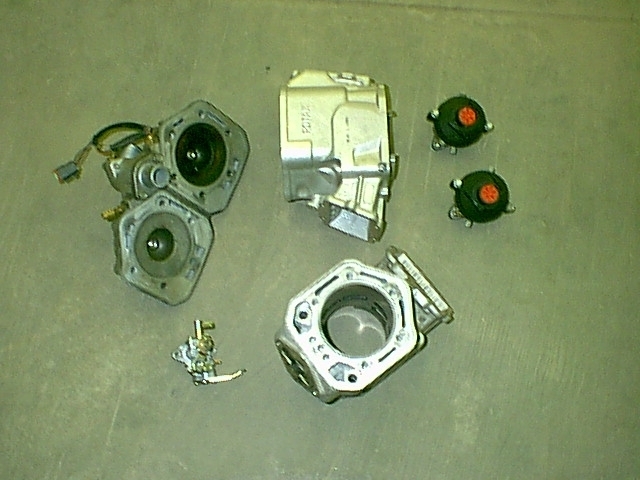
OK. Here is what I am starting with. I want to keep the stock stuff in case decide to sell the sled. I don't see that happening, but you never know. I had a couple of offers last winter, but I may be in the mood to sell it next year. You just never know when I get a whim to build a new one.
I have two cylinders and RAVE housings I originally bought to do my other engine, but ended up buying a whole engine.
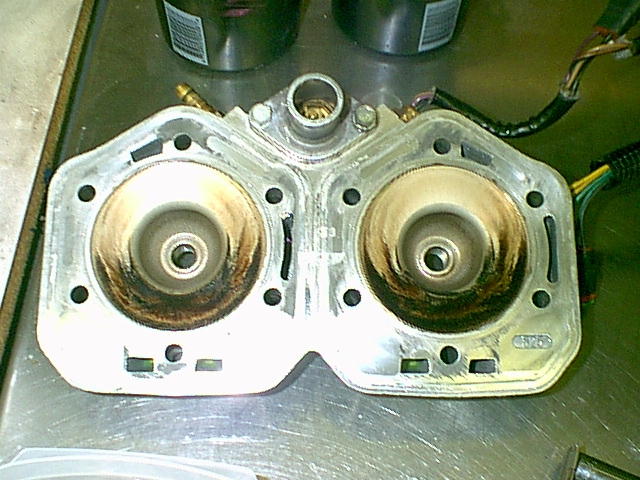
I just got the cylinder head off ebay for $42 shipped to the house.
I also dug out a used oil pump from my stock of stuff to be modified for the bearing.
I want to get all the stuff done up and ready to put in all in one shot.
I will be posting pictures along the way when stuff is in.
I will be completely pulling the motor out and checking the crank for any issues. I will be putting new PTO and MAG side seals in, checking the bearings and checking runout before it all goes back together.
--------------
I got the cylinders boxed up and will be shipping them to US Chrome to have them remove the plating and have it bored to first depth.
Then they are off to Kelsey to have him work his magic.
This is a new experience for me. I usually do my own port work, but I am leaving all that to Kelsey's capable hands. I am just going to do the assembly work and tuning.
And the new project begins....BONZAI!!!!!
--------------
If there is anything wrong with the crank, it is getting replaced. I can get a reman crank from Ski-Doo for about $460 with my dealer discount. So it would be just cheaper to replace it, than to fix a couple of bearings. Parts are cheap for that crank, but labor kills you if you have a center bearing issue.
I shipped the cylinders to Scott Reath at US CHROME on Monday. I spoke with him this morning. He is going to strip them down and bore to Kelsey's recommendations.
Once they are done, he is going to send them to Kelsey to have him work his magic.
I always use US CHROME for all my plating. Scott is excellent to work with, and their pricing is just as incredible for the quality of work they do. In addition, the US CHROME NiCom process is the very best.
I had my last motor webbing between the ports (you probably remember from the mountain sled build, and the pictures from there) cracked. A couple of local shops said it could not be fixed and to just cut it out.
I met up with Scott at Hay Days and dropped them off. He said "not a problem". When I got them back, they looked like it never happened. Awesome work!
If anyone wants to get ahold of them, here is their info:
You can call Scott at (920)922-5066 or email him scottr@usnicom.com
Once I get them back from Kelsey, I will post some pictures. After the car show on June 12, I will be tearing the motor out of Blade for the rebuild. I hope to have all the parts and porting work done shortley after that.
Stay tuned, I will be posting more as we go....
--------------
Plenty of time to sleep when I am dead, as they say.
On the next project.
The Jet Boat is done.
The mountain sled is done.
After the show on Saturday, I will be tearing out the motor on my trail sled.
I spoke with Kelsey today, and he is shipping out the upper end. I should have that some time next week.
So I will be starting that project next week.
So stay tuned......
--------------
I got a package in the mail last night from Kelsey.
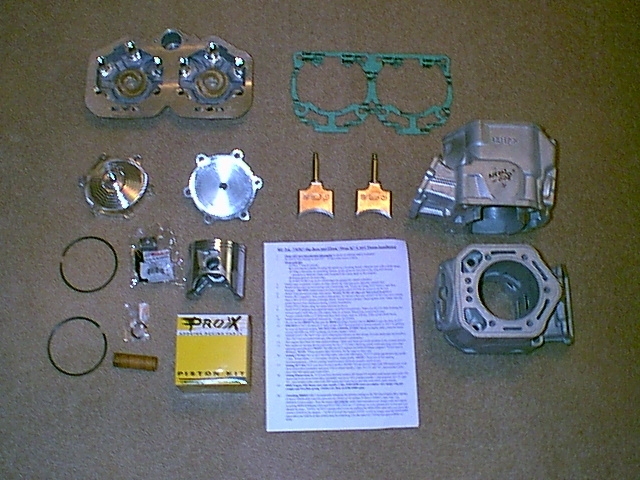
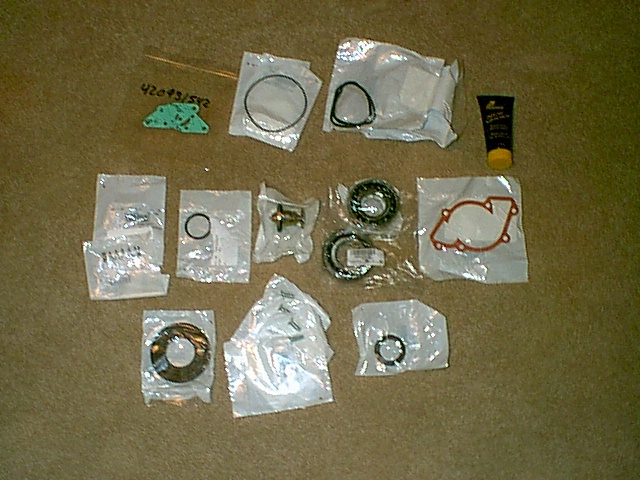
I got all my stuff back from him. I went through everything.
All of the work is top-shelf (like I knew it would be). The kit even comes with step by step instructions for not only installation, but jetting recommendations and clutching recommendations.
This is a very well put together product.
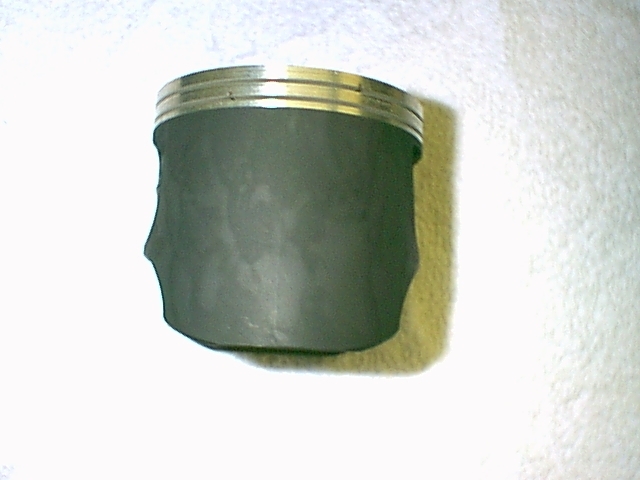
I boxed up the cylinders (with pistons) and shipped them to Scott at US Chrome. I am having him thermal barrier coat the tops of the pistons, and put his graphite coating on the side skirts.
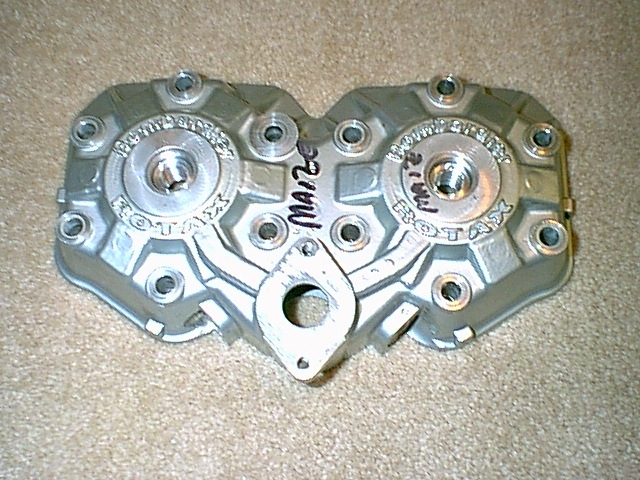
Here is everything shipped back as I got it yesterday:
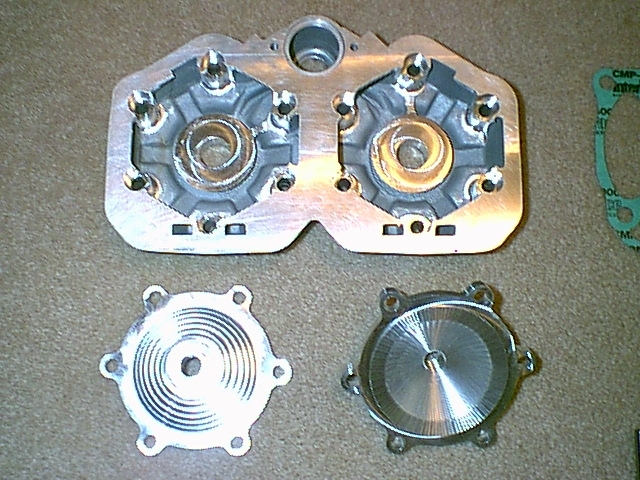
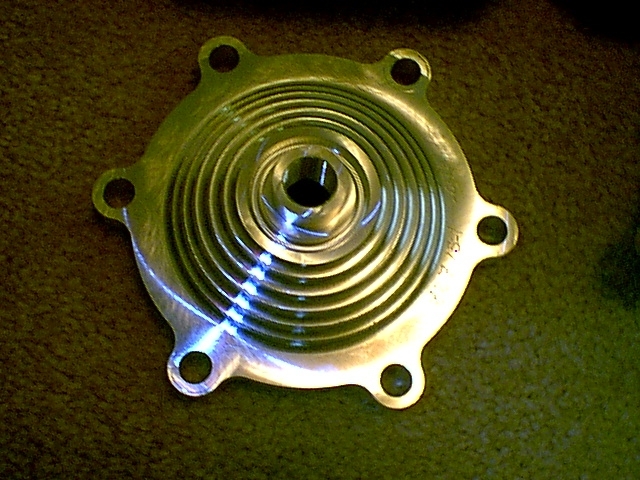
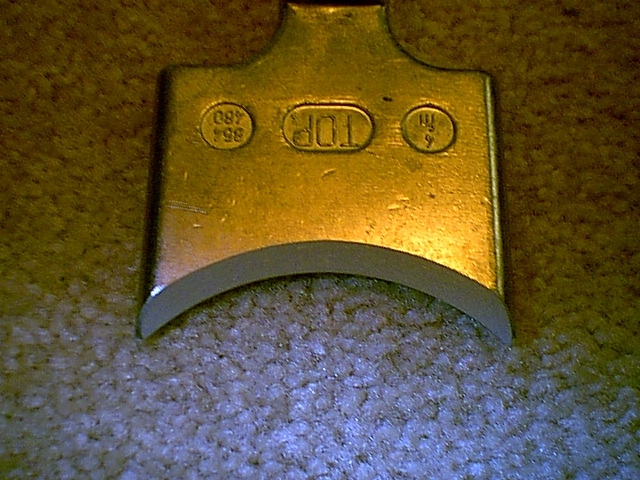
I opted to have Kelsey make me up a cheater head again. I like the stock look of the engine. Anyone who knows me, though, knows better of what is inside. LOL.
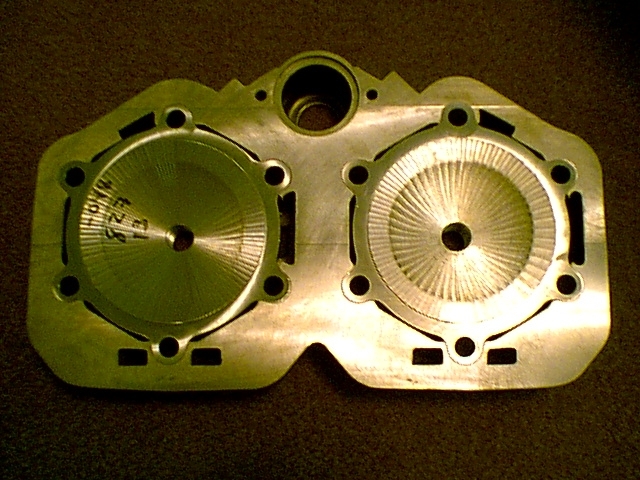
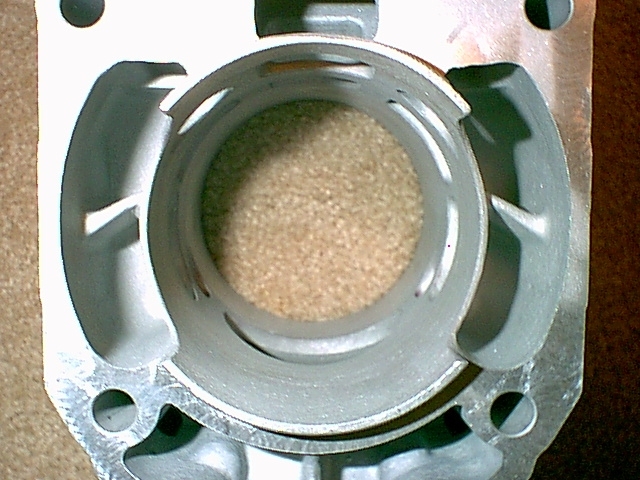
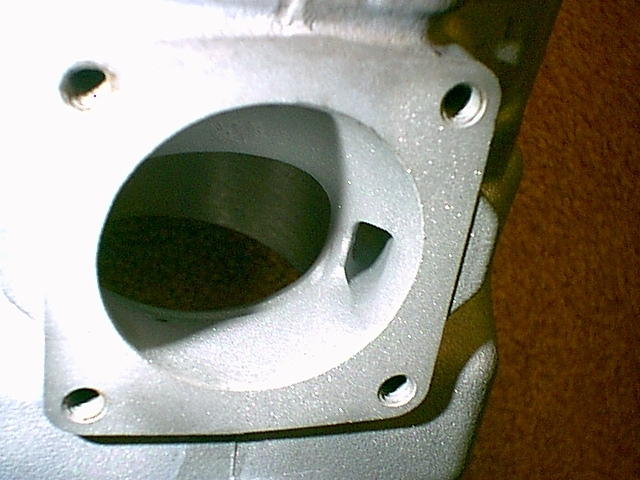
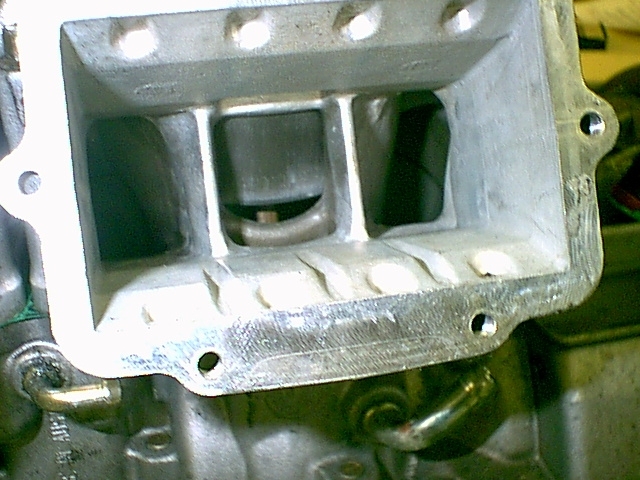
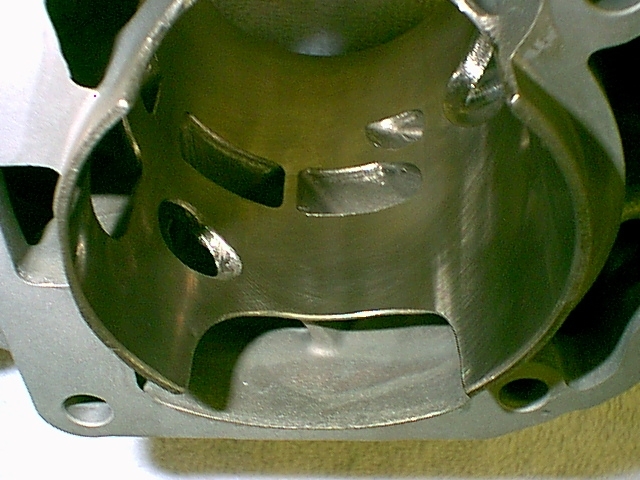
Here is the machine work done to the new RAVE valves I sent him. Again, top-notch machine work.
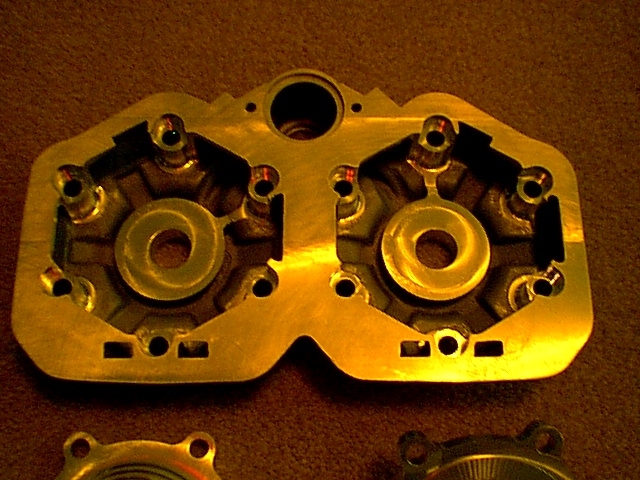
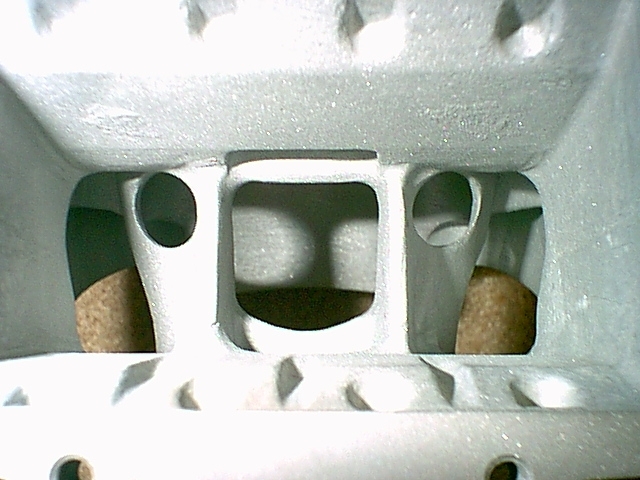
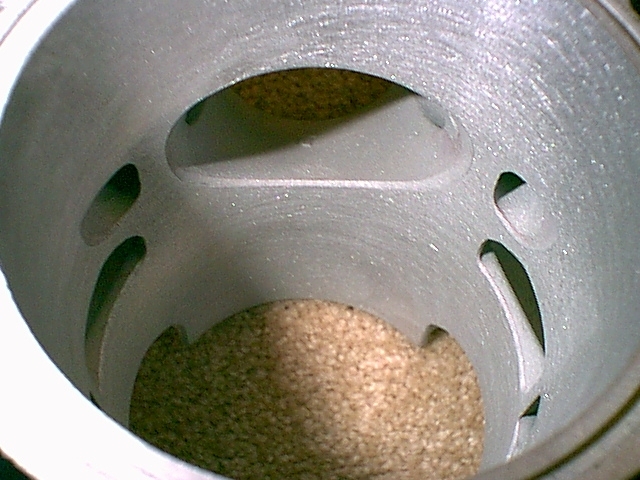
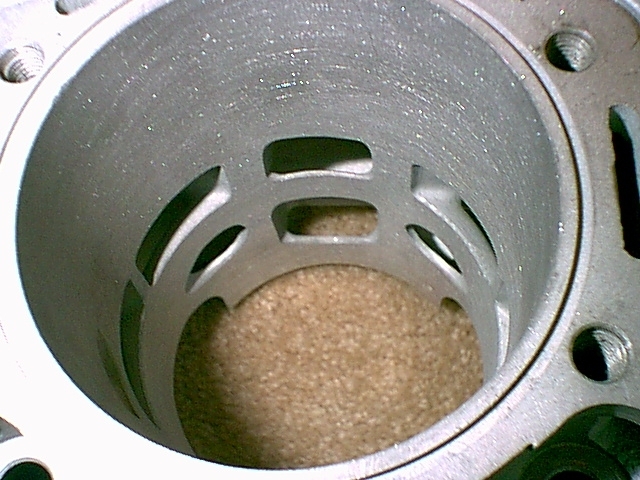
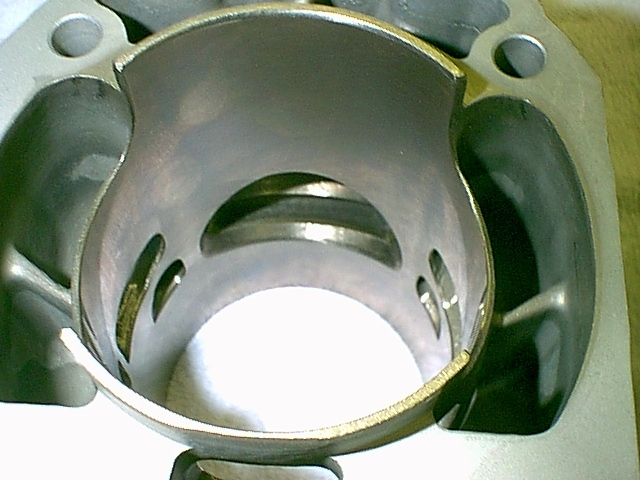
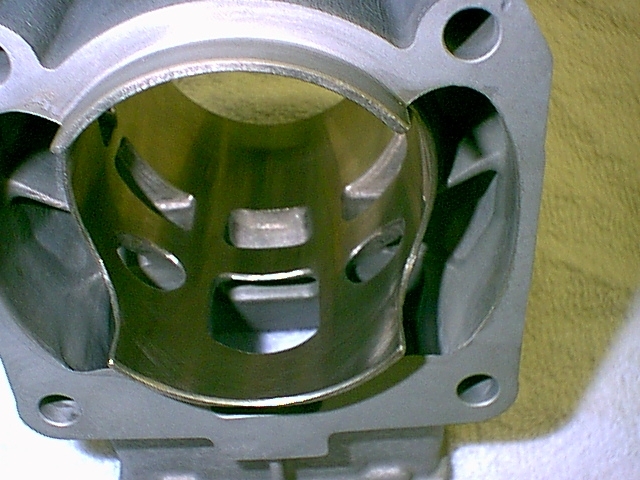
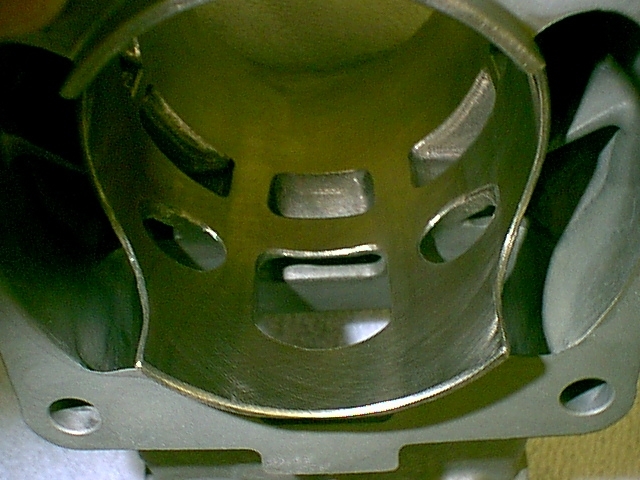
Here is close-up shots of Kelsey's port work.
He finishes his work the same I as I do mine. With a light sandblasted finish.
The cylinders are all boxed up and on their way to US Chrome. I should have something back in the next week, or two.
I was going to send out the MPEM's to both sleds, but didn't want to risk not being back for the show. My next show is the Grass Drags in Wauconda, IL on August 21. I have plenty of time to get them back for that.
So this weekend, I will be removing the MPEM's from both Blade and Spawn and sending them in to be reflashed.
--------------
The plan is to take detailed pictures of the entire process.
I will have step-by-step details of the entire process from removing the engine to install and start-up.
I will be pulling the whole motor out. Pulling the crank out of the case and checking all the bearing. If any are bad, I will probably just replace the entire crank with a remanufactured unit from Ski-Doo.
Either way, the crank will be trued, and new seals installed on both ends. I will put new ISOFLEX grease in both ends and then reinstall.
I will also be installing bigwormskidoo05's oil pump fix on this engine, as well.
This weekend I am removing all sleds and cleaning before I start any new projects. With the Spawn build and repainting the Sea-Doo Speedster trailer, the garage is a disaster area.
So after this weekend, I am starting to remove the engine. This might take some time as from here on out, I plan on playing a TON of golf. So don't expect this to be done in a couple of weeks.
I will also be working on putting the stereo system in the Tacoma. I will be pulling the entire interior out. I will be putting Dynomat on the entire inside of the truck and building a fiberglass enclosure to go behind the rear seats to hold the subs, an amp, the Caps and the CD changer.
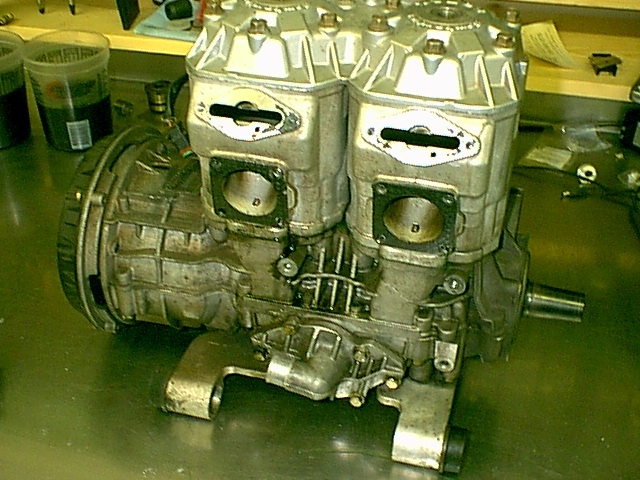
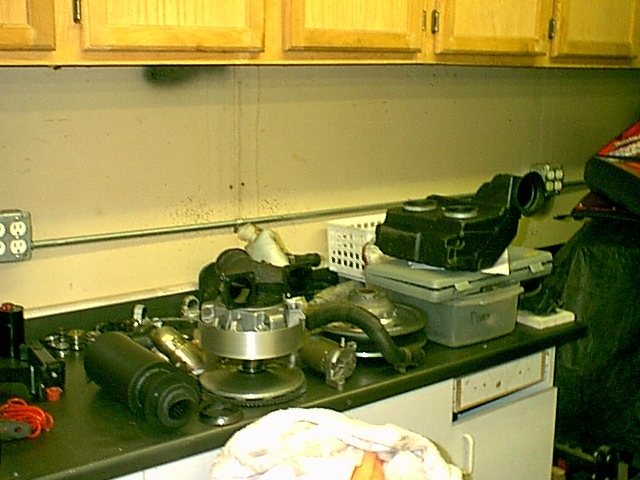
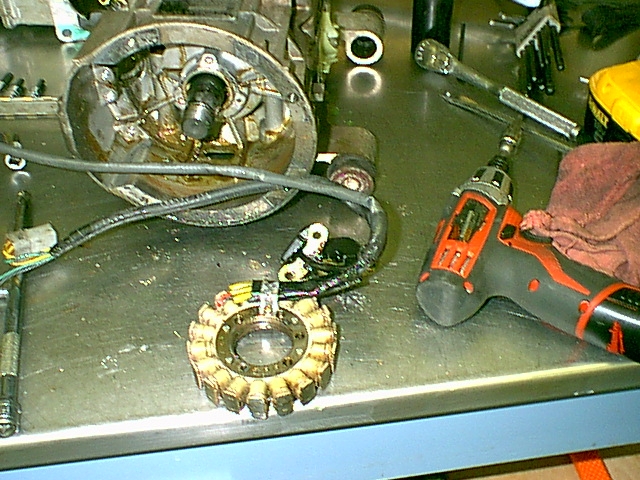
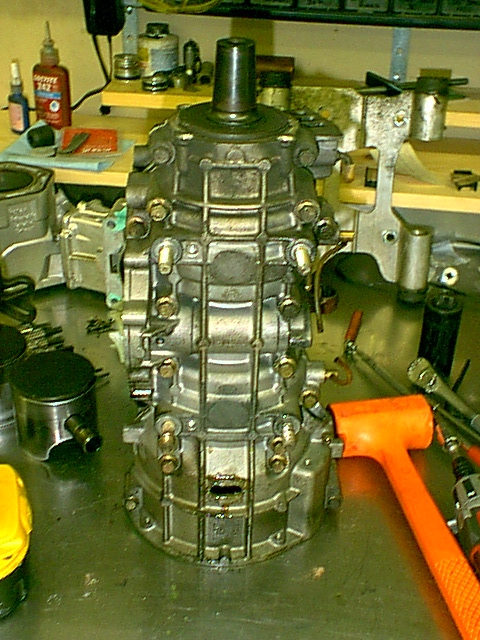
Well. The motor is out and on the bench. I was planning on getting it torn down, and get the crank over to the shop to have it tanked and checked.
However, I sold the boat today and they are picking it up on Friday. I am getting it cleaned back up and all the stuff put in it and ready to go. I haven't even had it in the water yet. So tomorrow, we are taking it to the res as the river is too high and they closed it this afternoon.
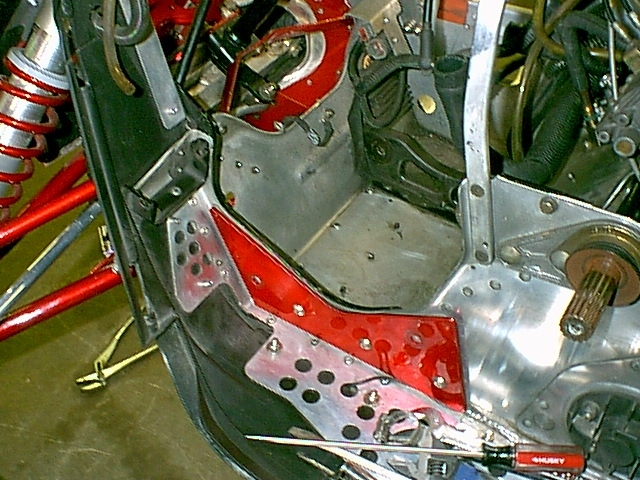
Here are the shots of the engine on the bench and the empty engine bay. Nothing exciting.
I was going to do a step by step, but I figured most people who are looking at this for an option already pretty much have it figured out.
I got the engine torn down today, and am going to drop it off at the shop in the morning.
I am having Recreational Motorsports hot tank the case and a couple of other pieces, and have the crank checked out.
After he hot tanks the crank, it can be checked for rod run-out, bearing tolerances and crank run-out.
It looks like the MAG side seal was leaking. The bearings were pretty washed, but they were soaked with oil.
This motor has almost 8,000 miles on it. I only used mineral oil.
No picture updates, but I do have an update:
The crank was out of synch somewhat, the MAG side is .005" out and the PTO side was .009" out.
The bearings are fine with the exception of the MAG side inner. It seamed to roll OK, and there were no rough spots, but it just doesn't spin freely, even after cleaning twice in the hot tank.
I ordered up two new bearings, since I am a dealer, it is still way cheaper to replace the two bearings than the whole crank as the rest of the bearings are fine, including the rod bearings. The inner seals are also good.
I will put the new bearings and synch the crank to 0.000 runout.
I know it isn't much, but just wanted to keep everyone updated.
I got the ISOFLEX grease in the mail yesterday.
I am hoping to have the BRP stuff on Friday, but that is pushing it. It probably will the first part of next week.
The plan is to have this done by the end of July. I want to get the Tacoma finished up by Haydays.
I wish I didn't have to work during the day at a day-job. LOL
I got a package in the mail today...
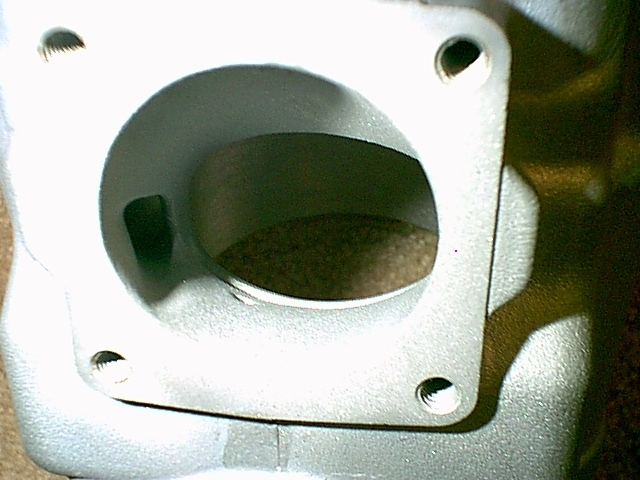
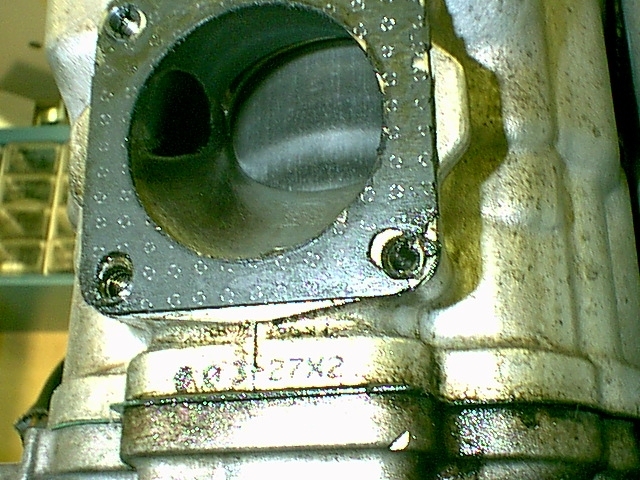
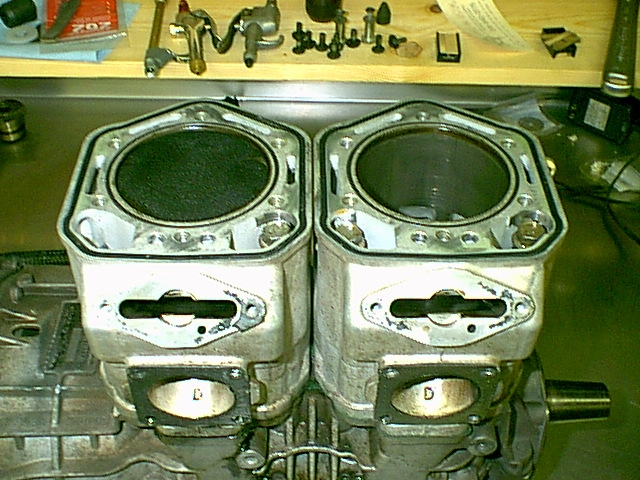
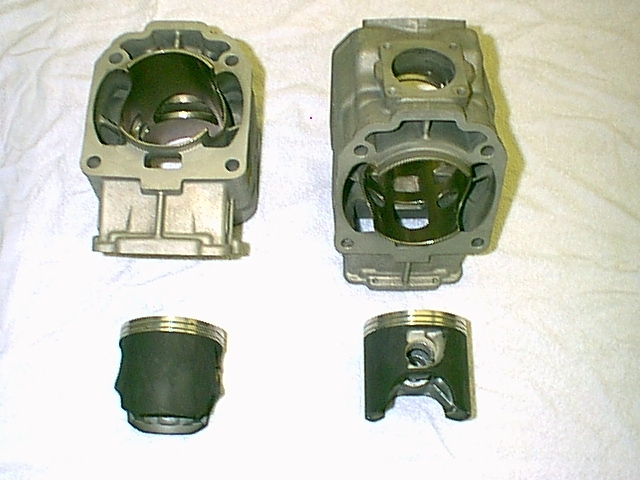
The cylinders are back from US Chrome. Scott did his usual outstanding work to compliment Kelsey's excellent port work.
No coating on the top of the piston, graphite coating on the skirts.
Kelsey and I talked about this. I don't usually run any of my motors without a thermal barrier coating. He did not recommend the thermal barrier. But said if it didn't add any width to the piston, he was OK with the skirt coating.
So they are ready to go.
My account was charged today for the rest of the list of my stuff. I am hoping the rest should be here by the weekend. If so, I can get the bearings to the shop and get those installed the crank trued up.
Here are the finished cylinders:
Hopefully, I will another box of goodies in the next couple of days.
OK...I got all the stuff in the mail today.
I will get it over to the shop on Monday, and hopefully get it back by the following weekend.
Here is all the stuff. The bearings, the seals, gaskets and ISOFLEX -
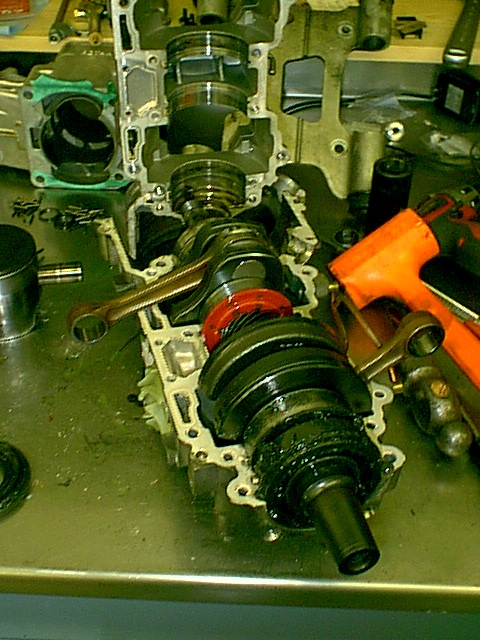
OK. Scott got the bearings on crank and both ends trued to 0.000" runout.
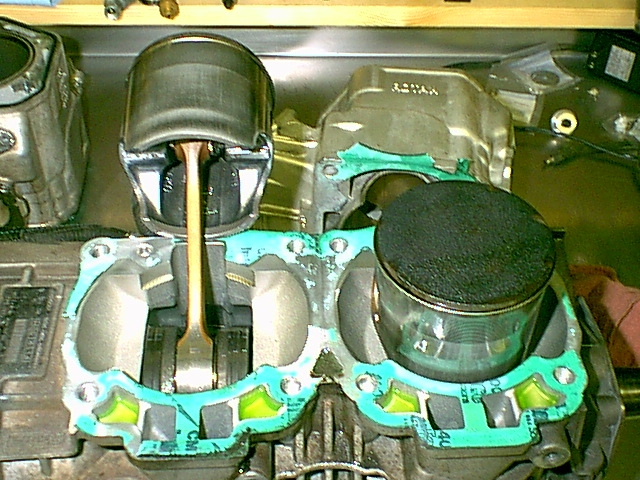
I have the pictures of the buildup from start to finish. This will show you how to put the engine back together.
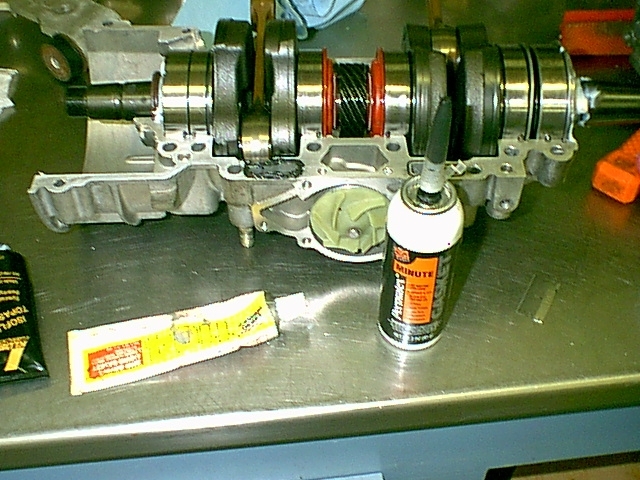
Even though the cases were hot-tanked, I go over them with laquer thinner and a clean rag. I want to make sure the 3-Bond adheres to the case halves.
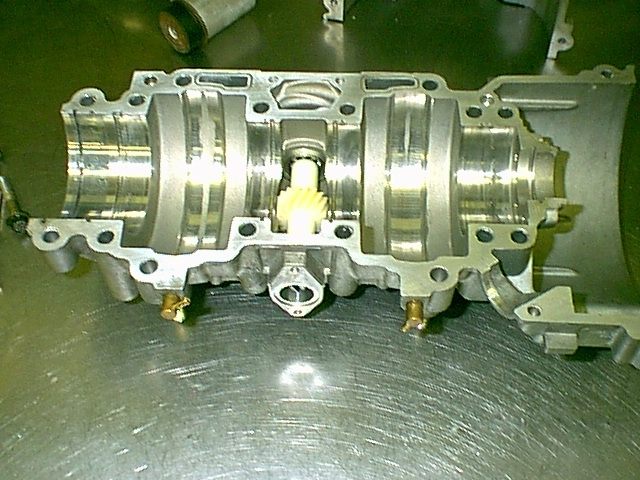
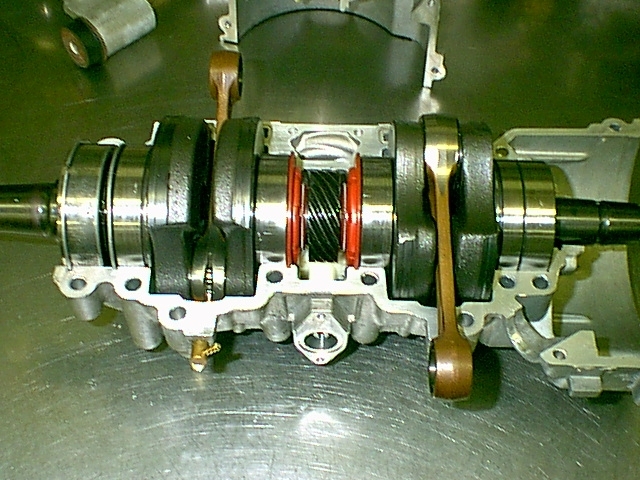
Next was to test fit the crank to make sure it lines up properly.
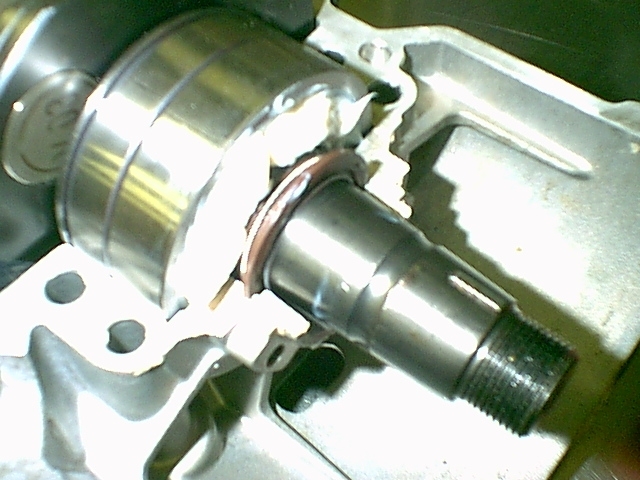
The crank fit perfectly, and it spun freely. So I loaded up both end bearings with ISOFLEX grease. I used a butter knife to force the grease into the bearings.
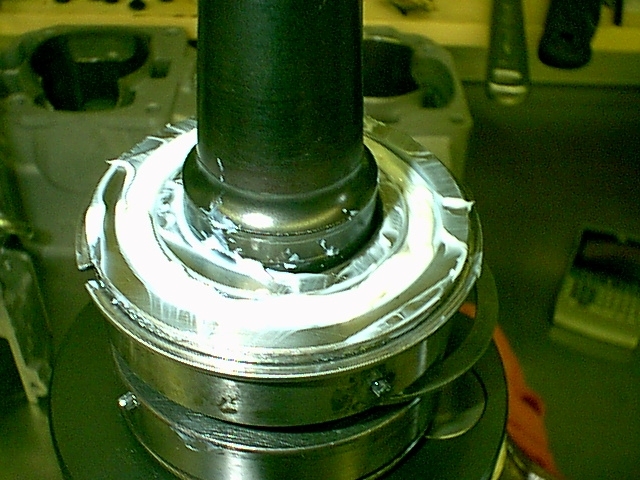
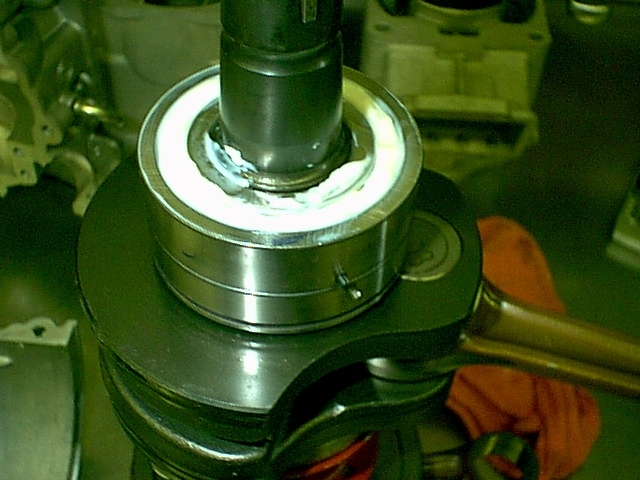
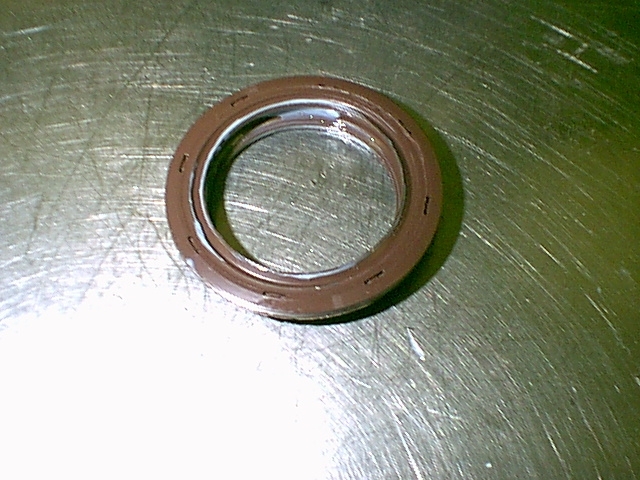
I then put some of the ISO grease on the inner lip of the MAG side seal. This seal has to be set on the crank before installing the crank.
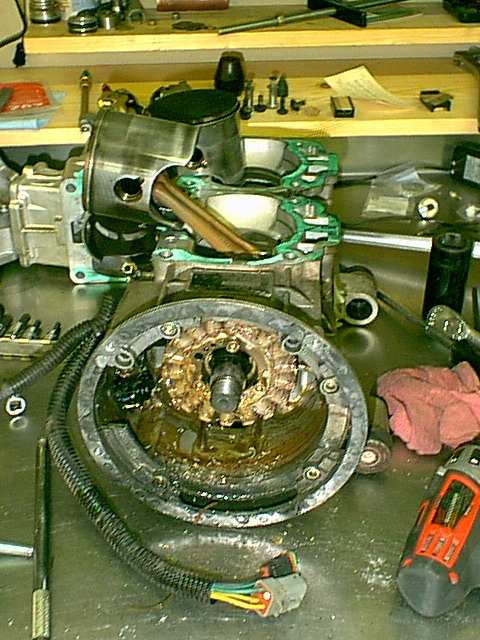
Next, I dropped the crank in place. Make sure that all external bearing races are clean of ISO. I again used a rag with laquer thinner to remove all residual oil from the outer part of the bearing the mates to the case.
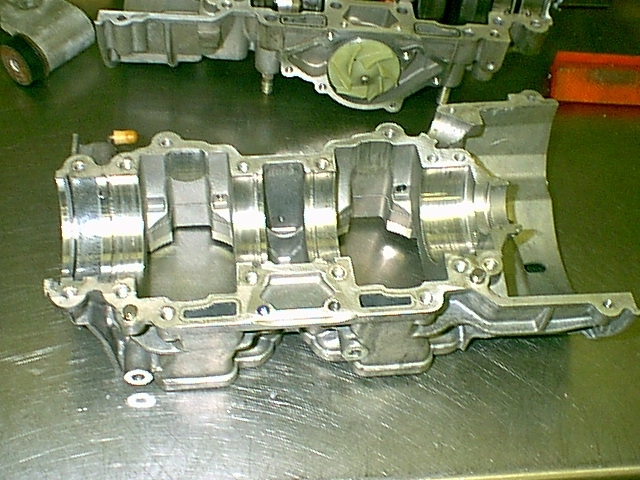
Once the crank is in the lower case, I lightly seat the crank bearings with a rubber mallet. Don't beat on it, just tap it into place. Then I load up the PTO side with more ISO. The next step is to put the upper half of the case on the bottom. It must be sealed with 3-Bond (or similar), I also use Permatex "Right-Stuff" for the water jacket area.
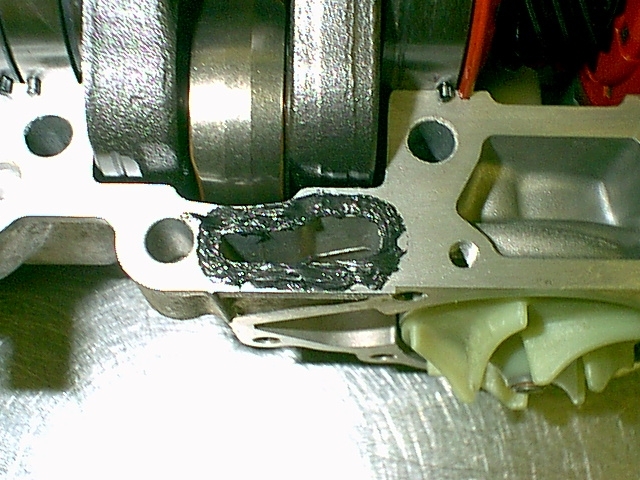
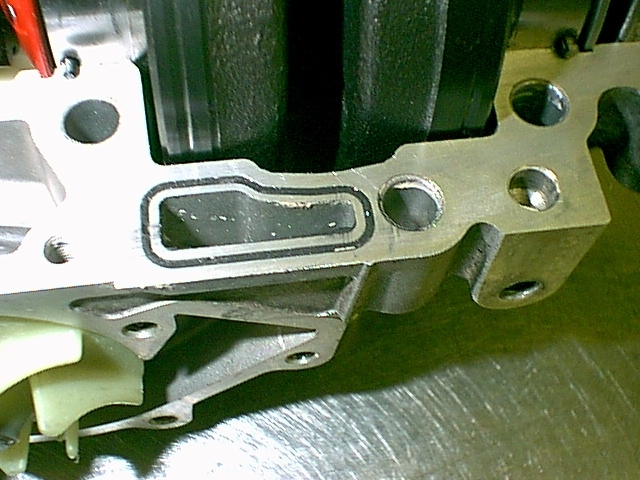
This is how I do the water jackets. You can't buy the seals from Ski-Doo. Right stuff swells just a little when it drys, so it makes it perfect for this application. I just put a bead in the water jacket recess, then (while it is still we) I trim it off with a razor blade.
The next step is to apply the 3-bond. You don't need to put a lot of this stuff on. If you do, you will have it all over the place, including on the inside of the case. You just need enough to seal it. The cases are a machine finished mating surface.
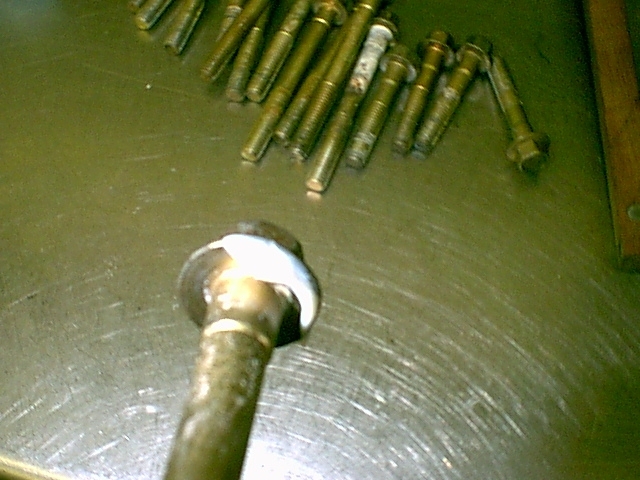
The next step is to put the case halves together. I put some ISO on the bolt heads to torque to a true reading. I tapped the upper case half to seat it. Don't force it, just tap with a rubber mallet.
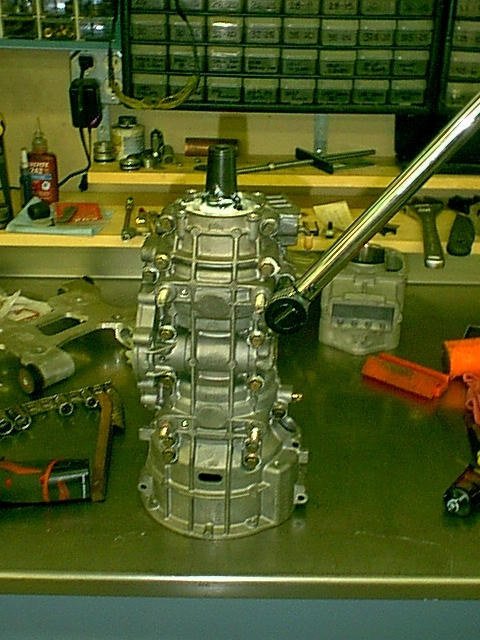
I torqued the case to 15ft/lbs starting in the middle and working out in a circular pattern. Then went back over them with the finish torque setting of 21ft/lbs. I then went back and checked them a second time to assure they were all correct.
The next step was to load up the PTO side bearing with ISO and put the seal in place: